How to Use an Oil Burner: Step-by-Step Guide & Safety Tips
This post contains affiliate links. As an Amazon Associate, we earn from qualifying purchases.
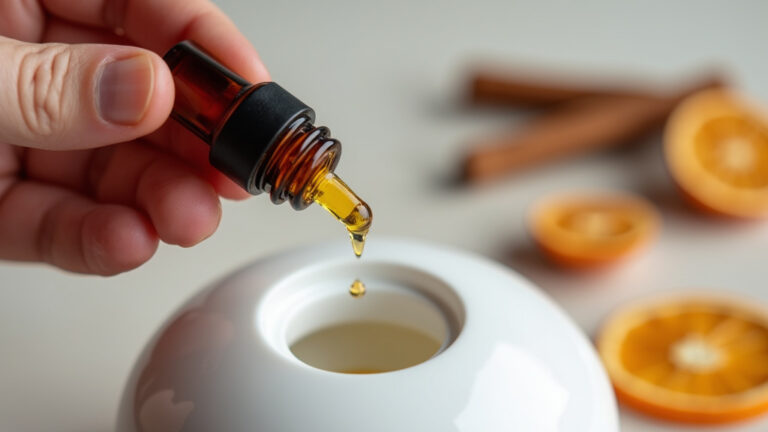
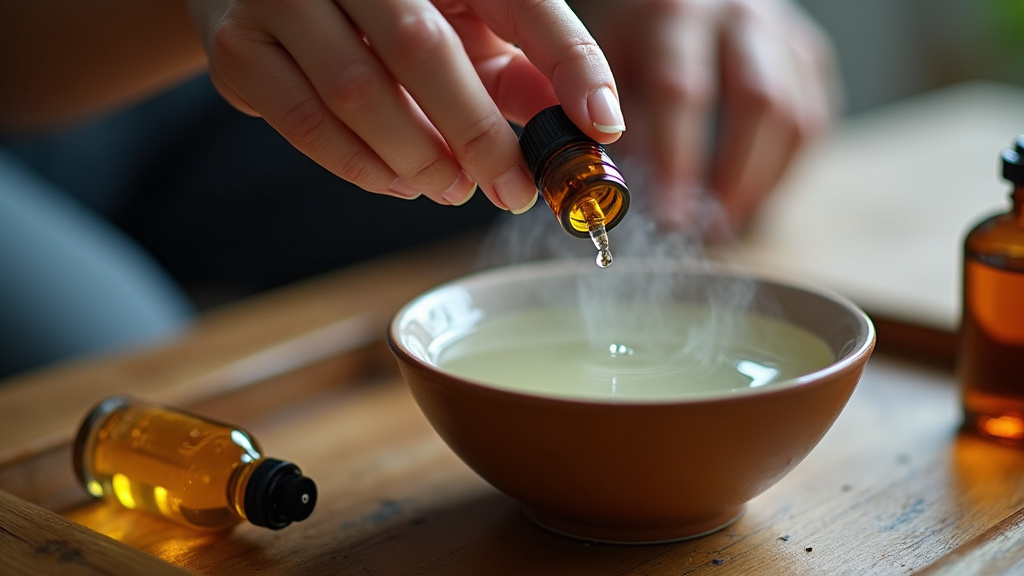
To use an oil burner, place it on a stable surface, fill the top bowl two-thirds with water, add 5-8 drops of pure essential oil, and apply gentle heat from a tea light or electric element. The heat warms the water, causing the oil to evaporate and fill the room with aroma.
Most guides skip the part where the water actually runs out. They show a serene setup, then cut to a clean room smelling of lavender. The reality is a dry, scorching ceramic bowl and the acrid smell of burnt essential oil ten minutes after you walked away. That smell doesn’t air out for hours.
This guide walks through both traditional tea light and modern electric burners. You’ll get the step-by-step, the why behind each rule, and the maintenance habits that keep your burner from becoming a fire hazard or a sticky, scent-blended paperweight.
Key Takeaways
- Always fill the water bowl at least two-thirds full; an empty bowl overheats the oil, burning it and potentially cracking ceramic.
- Limit burning sessions to 20-30 minutes. Longer sessions overwhelm the air with concentrated vapors and accelerate water evaporation.
- Use only pure essential oils or wax melts designed for burners. Reed diffuser refills or lamp oils have different flash points and can produce toxic fumes when heated.
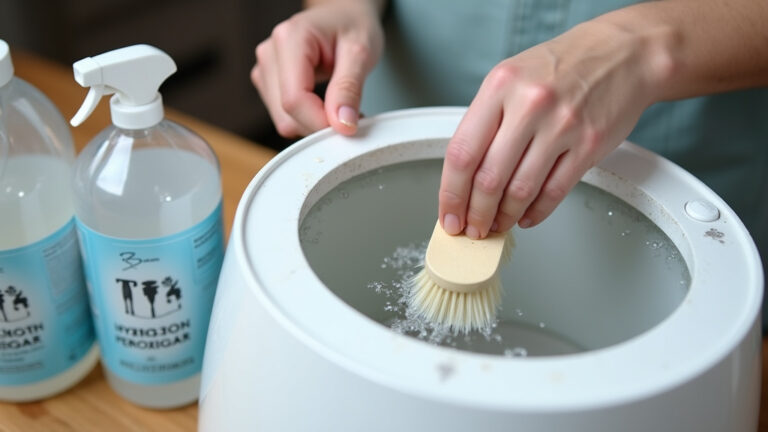
- Clean the bowl weekly with isopropyl alcohol. Oil residue polymerizes into a sticky varnish that dulls future scents and is a pain to remove.
- Never, ever leave a lit burner unattended. This applies to electric models too, faulty wiring or a pet knocking it over happens fast.
The Two Types of Oil Burners (And Why It Matters)
Head design changes the entire process. You have two main paths: the classic tea light burner and the plug-in electric model. Choosing wrong means buying the wrong fuels and following the wrong safety rules.
A traditional oil burner is a two-piece ceramic or stoneware unit. The top holds water and oil; the bottom cradles a small tea light candle. The candle’s flame provides a gentle, radiant heat. It’s simple, inexpensive, and adds ambient candlelight. The trade-off is an open flame.
Electric oil burners, often sold as candle warmers or wax melt warmers, use a small lightbulb or a heating plate. You plug them into a wall outlet. They eliminate the fire risk of an open flame, making them safer for households with curious kids or pets. They also offer more consistent, adjustable heat. Their weakness is cord management and the need for an outlet.
| Burner Type | Best For | Primary Risk | Maintenance Quirk |
|---|---|---|---|
| Traditional (Tea Light) | Ambiance, low-tech reliability, portability | Open flame, unattended burning | Ash cleanup, wax drips from the candle |
| Electric (Plug-In) | Safety-conscious homes, consistent heat, longer sessions | Electrical fault, cord hazard | Mineral deposits from tap water on the heating element |
I used a beautiful glazed ceramic burner from a craft fair for years. One afternoon, the candle flame flared slightly higher than usual against a tiny, unseen crack in the lower chamber. The ceramic split with a soft ping, spilling scented water and hot wax across my wooden side table. The table still has the ring. I now inspect every new burner under a bright light before its first use.
TL;DR: Tea light for atmosphere and simplicity; electric for safety and set-and-forget heat. Your living situation picks the winner.
The 7-Step Process for Traditional Tea Light Burners
Follow this sequence exactly. Swapping steps two and three, for instance, leads to oil droplets clinging to a dry bowl rim instead of mixing with the water.
Before you start: The burner must be cool, clean, and placed on a level, heat-resistant surface like a ceramic tile or granite countertop. Keep the bottle of essential oil well away from the candle’s location. Have a cup of warm water nearby for refills.
-
Inspect the burner. Run your fingers inside both chambers. Feel for hairline cracks or chips, especially around the rim of the top bowl. Heat expands these flaws fast.
Skip this, and the thermal stress finds the weak spot. The crack may not be visible until hot water seeps out the bottom. -
Fill the top bowl two-thirds with warm water. Warm water reduces the initial thermal shock on the ceramic and gets the vapor flowing quicker. Leave an air gap to prevent bubbling over when it heats.
> Common mistake: Filling the bowl to the brim, the water expands as it heats and will bubble over, carrying oil with it and creating a sticky, flammable mess on the burner’s exterior. -
Add 5 to 8 drops of essential oil. Five for potent oils like eucalyptus or peppermint. Eight for softer scents like lavender or chamomile. The water acts as a diluent and carrier.
The water isn’t just there to look pretty. It slows the oil’s evaporation rate, spreading the aroma evenly over the session instead of blasting it all out in the first two minutes. Without water, the oil sits directly on hot ceramic, burning and altering its chemical profile, that’s the acrid note you sometimes smell. -
Place a tea light in the lower chamber. Center it. An off-center candle creates a hot spot on one side of the bowl above, leading to uneven vaporization and premature water boil-off on that side.
-
Light the tea light. Use a long-reach lighter or match. Your hand should never be over the top bowl when you do this, any residual oil on your fingers can drip and ignite.
-
Monitor the session. A good session lasts 20 to 30 minutes. Watch the water level. If it drops near the halfway point, carefully add a few teaspoons of warm water using a spouted cup. Never pour cold water into a hot, nearly dry bowl.
> The ceramic can crack from the sudden temperature change. If you let it go completely dry, you’ll hear a faint sizzle as the last drops vanish and the oil starts to smoke. That’s your five-second warning to extinguish the flame. -
Extinguish and cool. Snuff the tea light. Let the entire unit cool to room temperature before you move it. The top bowl stays hot long after the flame is out.
How to Use an Electric Oil Burner (The Safer Alternative)
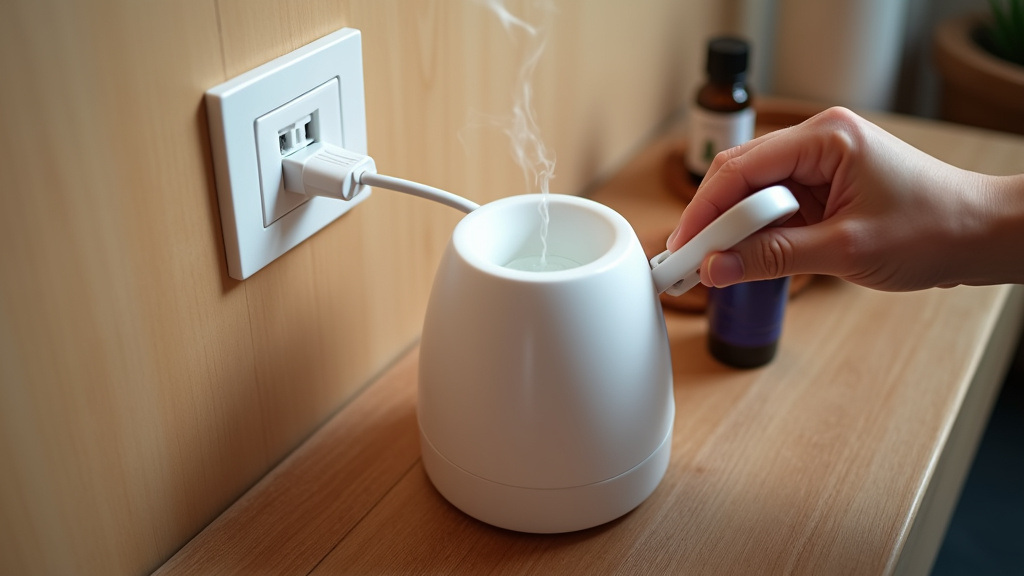
Electric models remove the open flame, but they introduce a plug, a cord, and a heating element. The core steps are similar, with a few critical substitutions.
First, never use an extension cord. Plug the unit directly into a wall outlet. The low wattage seems harmless, but a frayed cord under a rug is a standard house-fire starter. If your model has a switch, make sure it’s in the ‘off’ position before plugging it in.
Fill the bowl with 1 to 2 inches of water. Electric elements often sit directly beneath a shallow ceramic or metal dish. Overfilling risks water seeping into the electrical housing. For areas with hard water, use distilled water. The minerals in tap water leave a white, crusty scale on the heating plate after a few dozen uses, insulating it and reducing efficiency.
Add your oil drops, the same 5-8 rule applies. Then plug in the unit and turn it on. The heating cycle begins. You’ll usually see a small indicator light.
The session duration is the same: 20-30 minutes is the sweet spot. Because there’s no flame to monitor, the temptation is to leave it on for hours. Don’t. The water still evaporates. I once left a cheap electric warmer on for two hours while working in another room. I returned to a bone-dry, scorchingly hot dish and a room that smelled like a pine-scented chemical fire. The plastic housing around the lightbulb had slightly warmed. That unit went in the trash.
TL;DR: Plug directly into the wall, use distilled water if you can, and respect the same 30-minute timer as a flame burner.
What Oils and Fuels Can You Actually Use?
Not every fragrant liquid belongs in a burner. This is where people ruin expensive machines or worse, fill their lungs with something nasty.
Pure essential oils are the gold standard. They are volatile aromatic compounds extracted from plants, designed to vaporize at low heat. Brands like doTERRA, Young Living, or Plant Therapy work perfectly.
The water in the bowl heats to just below boiling, around 85-95°C (185-203°F). This temperature is ideal for gently releasing the essential oil’s aroma molecules into the air without burning them. Burn them, and you get that harsh, smoky smell.
Banned Substances:
- Reed Diffuser Refill Oil: These are often a mixture of essential oils, fragrance oils, and a heavy carrier oil (like dipropylene glycol) to slow evaporation for reeds. Heat turns the carrier oil into a sticky, smelly glaze.
- Lamp Oil or Liquid Paraffin: These have a much higher flash point and are meant to be burned as fuel, not vaporized. They will smoke and produce soot.
- Rubbing Alcohol or Other Solvents: Flammable. Obvious, but I’ve seen it tried.
Wax melts are a fantastic alternative for electric warmers. They are typically a blend of soy or paraffin wax and fragrance oil. You place a cube in the dry top bowl, no water needed. The heat slowly melts the wax, releasing the scent. Once cooled, the wax resolidifies and can be popped out.
The choice between oils and wax melts often comes down to versatility versus convenience. Oils let you mix custom scents drop-by-drop. Melts are less messy and longer-lasting. For creating dense atmospheric effects, understanding the properties of different fluids is key, much like selecting the right fog juice formulas for a specific fog machine output.
How Long Should You Burn Oils? The 30-Minute Rule.
More is not better. Aromatherapy works on subtle, sustained exposure. A 20 to 30 minute session is optimal for a standard-sized room (about 150 square feet).
Here’s the mechanism: your olfactory receptors become saturated. After about 30 minutes of constant exposure to the same scent, you literally stop smelling it. You’re just dumping more oil into the air for no benefit, wasting the oil and evaporating all your water. Furthermore, some essential oils in high concentrations can cause headaches or respiratory irritation.
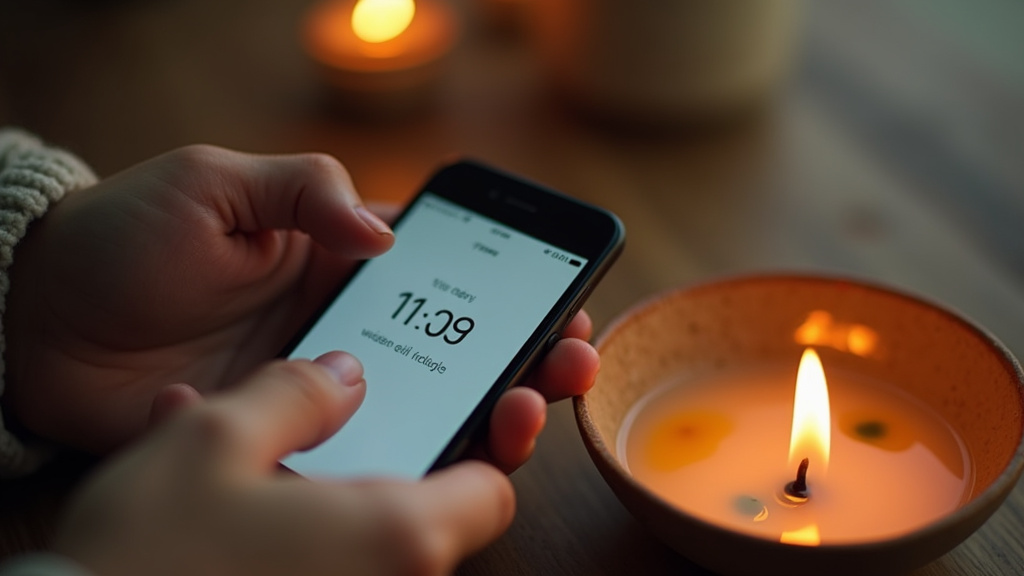
Set a timer on your phone. When it goes off, extinguish the flame or unplug the unit. Let the room air out for an hour or two before starting another session. This gives your senses a reset and prevents that heavy, overwhelming scent buildup.
If you need continuous fragrance, consider a different device. A cold-air reed diffuser or a nebulizing diffuser operates on different principles and is designed for all-day use. The heat-based oil burner is for focused, intermittent sessions.
Cleaning and Maintenance: The Sticky Truth
Neglect this, and your burner becomes a cocktail of every scent you’ve ever used, all muddled together. The residue also insulates the bowl from the heat, making vaporization less efficient.
After every use, once the bowl is completely cool, wipe it out with a dry paper towel. This gets the bulk of the oily film. Once a week, do a deep clean.
- Dampen a soft cloth or cotton pad with isopropyl alcohol (rubbing alcohol).
- Wipe the interior of the bowl thoroughly. You’ll see the yellow-orange oil residue transfer to the cloth.
- For electric warmers with a fixed plate, dip a Q-tip in alcohol to clean around the edges of the heating element. Unplug the unit first.
- Let the alcohol evaporate completely (a minute or two) before using the burner again.
For wax melt residue, let the wax cool completely until it’s solid. Then, gently flex the bowl or use a butter knife to pop the wax disk out in one piece. Wash the bowl with warm, soapy water, dry it, and it’s ready for a new scent.
This regular upkeep is as crucial as knowing your machine’s needs, similar to the maintenance outlined in a good fog machine maintenance guide for professional equipment.
Essential Oil Burner Safety: The Non-Negotiables
This isn’t scare tactics. It’s the distilled experience of what goes wrong when you get complacent with heat, water, and flammable substances.
- Never Leave It Unattended. Treat it like a lit candle. If you leave the room, extinguish it. This is the top rule in any official oil burner operation guide.
- Keep Away from Drafts and Flammables. A breeze from a vent or window can blow the flame sideways, overheating one part of the ceramic or igniting a nearby curtain.
- Place on a Stable, Heat-Resistant Surface. Wooden tables can scorch. Glass tables can crack from the concentrated heat of the lower chamber.
- Store Oils Safely. Keep your essential oil bottles in a cool, dark place, far from the burner when in use. A knocked-over bottle near a tea light is a major hazard.
- Keep Out of Reach of Children and Pets. The allure of the flickering flame and the pretty bowl is strong. The hot ceramic causes immediate burns.
I learned the draft lesson the hard way. A ceiling fan on low, which I never noticed, created just enough air movement to make the tea light flame dance erratically. It blackened one side of the burner’s lower chamber with soot in under ten minutes. The burner survived, but it was a clear warning.
Frequently Asked Questions
Can I use an oil burner without water?
No. The water is a critical safety buffer. It prevents the essential oil from reaching temperatures that cause it to burn rather than evaporate. Burning oil creates unpleasant smoke and can damage the burner bowl.
How many drops of oil should I use?
Start with 5-8 drops. For a stronger scent in a large room, you can go up to 10. Exceeding 10 drops is wasteful, the water can only hold so much oil in suspension, and the excess will just sit on the surface.
What’s the difference between an oil burner and a diffuser?
An oil burner uses heat (a flame or electric element) to vaporize oil suspended in water. A diffuser, typically ultrasonic, uses high-frequency vibrations to create a fine mist of water and oil that cools the room. Diffusers add humidity; burners do not.
Can I mix different essential oils in my burner?
Absolutely. That’s one of the joys. Start with simple blends like 3 drops lavender and 3 drops orange. Avoid mixing more than three oils at once until you understand how the scents interact when heated.
Why does my oil burner smell burnt?
You either let the water run dry, allowing the oil to burn directly on the hot surface, or you used an oil not suited for heating (like a reed diffuser oil with carrier agents). Always ensure adequate water and use only pure essential oils or designated wax melts.
Before You Go
Using an oil burner correctly boils down to respecting three elements: water, heat, and time. Keep the water level high, control the heat source, and limit your sessions. The ritual itself is part of the benefit, the few minutes of focused setup signal your brain to unwind. Choose quality, pure essential oils or wax melts; your nose and your burner will thank you. Finally, make that weekly alcohol wipe-down a habit. A clean burner is a reliable one, ready to deliver the exact scent you want, precisely when you need it. Just remember to set that timer.