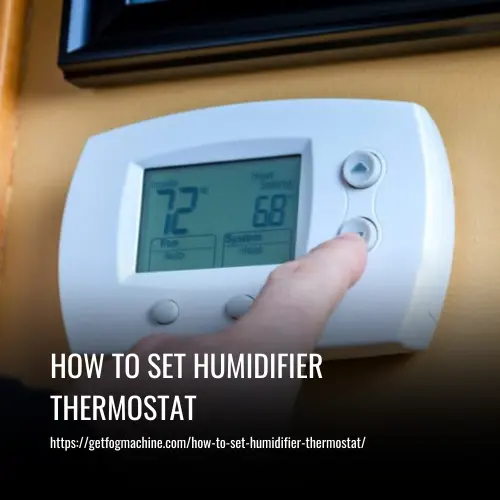
To set the thermostat on your humidifier, use the adjustment dial on an analog humidistat. The lower numbers represent lower humidity, and the higher numbers represent higher humidity. Turn the dial until you reach your desired humidity level, which may be represented by numbers or percentages.
Dry air in our homes can lead to discomfort, including dry skin and chapped lips. A humidifier can provide much-needed moisture to the air and improve indoor air quality, making it an essential item in many households. However, it’s important to properly set the humidifier thermostat to ensure that it is operating at an optimal level.
In this article, we will discuss the factors that affect indoor humidity levels and how to set your humidifier thermostat according to your comfort and health needs. We’ll cover the different types of humidifiers, how to choose the right one for your home, and tips and tricks for maintenance.
Keep reading to learn how to create a comfortable and healthy indoor environment with a properly set humidifier thermostat.
How To Set Humidifier Thermostat
A humidifier is an essential addition to your home when it comes to maintaining a comfortable and healthy indoor environment. However, setting it up may seem overwhelming, especially if you have no prior experience.
Follow these simple steps to get maximum comfort from using your humidifier while keeping energy costs low at the same time.
1. Check Manufacturer’s Recommended Temperature Range
The first step to setting up your humidifier thermostat is to check the temperature range recommended by the manufacturer. Different humidifiers are designed to work best within specific temperature ranges. Therefore, it is essential to adhere to the recommended temperature range to ensure optimal performance and avoid damaging your unit.
2. Set Your Target Humidity Level
Once you have identified the optimal temperature range, it’s time to set your target humidity level. Most indoor air quality experts recommend maintaining a humidity level between 30-50% for maximum comfort and indoor air quality. However, different types of humidifiers may have varying optimal humidity levels. Therefore, it is best to refer to your humidifier’s manual for guidance on the ideal level.
3. Adjust Settings Accordingly
With your manufacturer’s recommended temperature range and target humidity level in mind, it’s time to adjust your humidifier settings accordingly. Some humidifiers come with automated settings to maintain the optimal humidity level, while others require manual adjustments. In either case, monitor the humidity level and make adjustments until you achieve your desired results.
Adjusting your Humidifier Thermostat
Achieving a balanced and comfortable home environment is no longer a challenge with the help of a well-adjusted humidifier thermostat. The thermostat enables you to maintain an optimal humidity level, bringing a host of positive effects.
High humidity can foster dust mites, mold growth, and other allergens, while low humidity causes dry skin and static electricity. Ideally, most homes should maintain relative humidity between 30-50%.
How to Adjust Your Humidifier Thermostat
Adjusting your humidifier thermostat is straightforward and easy to execute. First, use an accurate thermometer to determine the indoor temperature of your home. The information will guide you in identifying the ideal temperature range to set on your humidifier’s thermostat for optimal performance.
Next, adjust the knob on the side of the unit until the relative humidity falls within the range of 40-45%. This level is usually comfortable for most people. It’s worth noting that temperatures may change over time, so monitor your humidifier’s settings periodically throughout each season, ensuring any necessary adjustments are made.
Benefits of Setting Your Humidifier Thermostat Right
Are you looking for ways to improve your indoor air quality and make your home more comfortable? One of the best ways to achieve this is by using a humidifier with an adjustable thermostat. Properly setting your humidifier thermostat can bring various benefits to your home environment.
1. Improved Indoor Air Quality
Setting the right humidity level in your home can reduce static electricity, protect wood furniture from cracking or warping due to dryness, and even reduce airborne viruses that thrive in low-humidity environments. It can also help alleviate allergies or asthma symptoms triggered by dry air, providing relief to you and your family members.
2. Comfortable Humidity Level
Maintaining an optimal humidity level can make your home more comfortable. The ideal relative humidity level for most homes is between 30% – 50%. With an adjustable humidifier thermostat, you can easily achieve this level, enhancing your indoor quality of life.
3. Efficient Humidifier Performance
It is important to check what type of humidifier device you have to ensure that you are adjusting the settings correctly. For example, if you have a cool mist unit, it should be set at 40%, while warm mist humidifiers should be set at 60%. This can help your humidifier work efficiently, ensuring that it is providing enough moisture to your home.
Humidifier Thermostat Tips
Humidifier thermostats are a great way to take control of your indoor air quality and improve your home comfort. To make the most of your humidifier thermostat, follow these tips:
1. Start by setting a temperature range that is comfortable for you. This will help ensure that the air in your home stays at an optimal level throughout the day and night.
2. Adjust the humidity levels according to what is comfortable for you and what is recommended by industry experts. This will help improve your indoor air quality and keep mold growth at bay.
3. Make sure to properly adjust any additional features, such as fan speed and timer settings. These can be useful tools to save energy and improve your comfort level.
With these simple steps, you can take control of your home comfort and improve your indoor air quality. You can also save money on your energy bills each month. Give it a try today and enjoy a comfortable and energy-efficient home!
FAQs
The recommended indoor humidity level typically ranges between 30% to 50%. For comfort and health, many people find a humidity level around 40-45% to be suitable. Adjust the humidifier’s thermostat to maintain a consistent humidity level within this range.
Use a hygrometer, a device that measures humidity levels, to monitor the indoor humidity. Place the hygrometer in various rooms to gauge the moisture levels and adjust the humidifier’s thermostat accordingly to achieve balanced humidity throughout your home.
Yes, humidity needs often vary with seasonal changes. In winter, when indoor air tends to be drier due to heating systems, you might need to increase the humidifier’s thermostat setting to maintain a comfortable humidity level. Conversely, during summer or in humid climates, you might need to lower the setting to avoid excessive moisture.
Adjust the thermostat as needed throughout the day based on humidity readings. However, many people find it convenient to set the humidifier’s thermostat in the evening before bedtime, as this allows for better regulation of humidity levels while sleeping.
Setting the thermostat too high can lead to excessive moisture in the air, creating conditions favorable for mold and mildew growth. Additionally, it might cause discomfort and health issues. Aim for a balanced humidity level to avoid such problems.
Running the humidifier continuously isn’t necessary in most cases. Instead, consider running it intermittently to maintain a consistent humidity level. Many humidifiers have automatic settings that turn the device on and off as needed based on the set humidity level, conserving energy and maintaining optimal moisture levels.
Conclusion
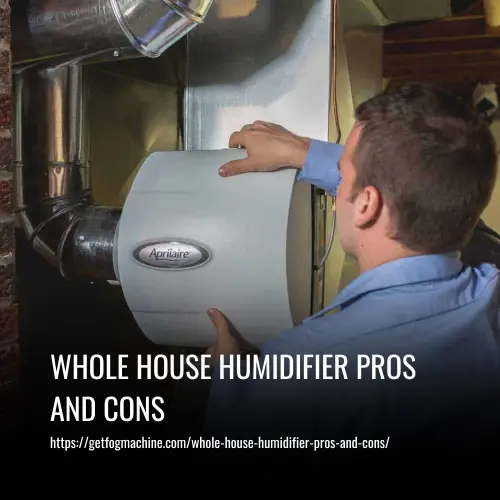
Setting the thermostat on your humidifier can greatly improve indoor air quality and create a comfortable environment in your home during the heating season. It is important to consider the type of humidifier you have, the optimal level of humidity for your space, and the outdoor temperatures and humidity levels to properly set your thermostat.
Installing a whole-house humidifier or enlisting the help of industry experts for humidifier services can also ensure that your home’s humidity is balanced and at a healthy level. Remember to regularly check and clean your humidifier to prevent mold growth and ensure optimal performance.
With smart humidity control and the ability to set specific humidity setpoints and thresholds, you can easily manage and control the level of humidity to suit your preferences.