Hydrogen Peroxide Fogging Guide: Efficacy, Safety & How-To
This post contains affiliate links. As an Amazon Associate, we earn from qualifying purchases.
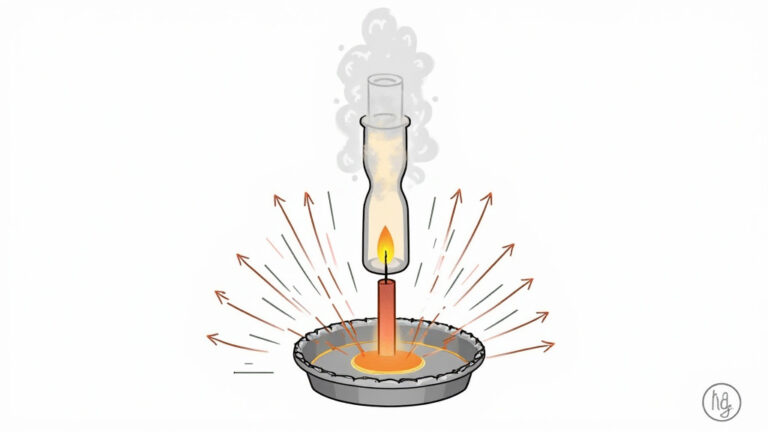
Hydrogen peroxide fogging disinfects surfaces by dispersing a fine aerosol mist, typically 5-9% H₂O₂, into a sealed space. The droplets settle on all exposed areas, oxidizing microbial cells upon contact. Successful implementation requires matching three things: a validated solution concentration, a fogger that produces the correct particle size (around 4 µm), and a documented protocol proving a 4-6 log reduction against target pathogens like C. difficile.
Most people think the concentration is the only variable that matters. They buy a jug of 3% drugstore peroxide and a cheap mister, then wonder why the room still smells of mold two days later. The concentration is just the fuel. The machine is the engine. The validation is the license to operate. Miss one, and you’re just making the air wet.
This guide covers the mechanics, the hard numbers from clinical studies, the safety rules you actually need, and the step-by-step protocol that passes a GMP audit. We’ll also break down why vapor systems are different, when a DIY setup makes sense, and how to read an EPA label.
Key Takeaways
- Fogging is not vapor. Fogging produces liquid aerosol droplets (4-6 µm) that settle by gravity; vapor is a true gas that condenses as a micro-layer. Vapor systems often achieve higher log reductions, especially on vertical surfaces and in complex geometries.
- Validation is non-negotiable for professional use. You must prove your specific 6% (or other) H₂O₂ fogging process achieves a 4-6 log kill under worst-case conditions in your specific room. A study published in Pharmaceutical Microbiology outlines the full validation framework regulators expect.
- Silver ions are a force multiplier. Adding 0.01% silver ions to a 5% H₂O₂ solution creates a synergistic blend. The silver catalyzes additional oxygen radical production and stabilizes the peroxide, allowing for lower concentrations that are gentler on electronics.
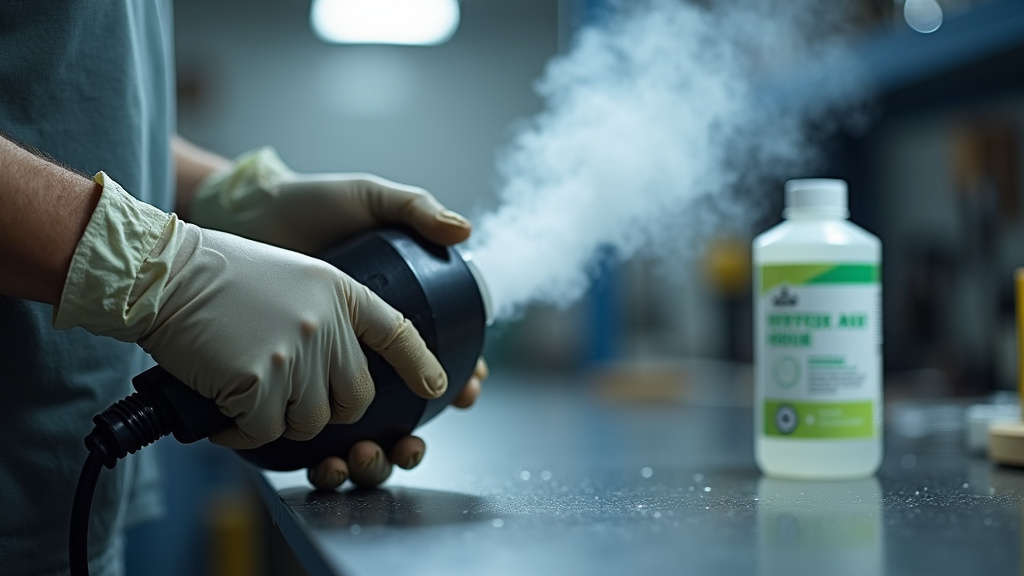
- Safety gear is mandatory during setup. Hydrogen peroxide is a sensitizer and irritant. Wear nitrile gloves and safety goggles when handling the concentrated solution, and use respiratory protection during machine loading and initial fog release.
- Cycle time is a major cost driver. Passive decomposition fogging cycles can run 2-3 hours for a 50m³ room. Catalytic aeration in vapor systems cuts that to 90 minutes. That extra hour of room downtime adds up fast in a hospital turnover schedule.
How Hydrogen Peroxide Fogging Actually Works
The process is deceptively simple: a machine turns liquid disinfectant into a fog that fills a room. The devil is in the droplet. Effective fogging requires the aerosol particles to be small enough to remain airborne long enough to distribute, but not so small they behave like a true vapor. The target particle size is 4 to 6 micrometers (µm).
Hydrogen peroxide fogging utilizes a nebulizer or piezoelectric actuator to aerosolize a liquid solution into a fine mist of droplets approximately 4–6 µm in diameter. These droplets are dispersed into the air of a sealed enclosure, where they settle via gravity onto all exposed surfaces. Upon contact, the hydrogen peroxide (H₂O₂) oxidizes microbial cell walls and disrupts essential proteins, achieving microbial kill. The solution then breaks down into water and oxygen, leaving no toxic residue.
A 4 µm droplet is light enough to drift into ceiling vents and behind radiators. A 10 µm droplet falls out of the air too fast, leaving the upper third of the room untreated. This is the first place DIY methods fail, a garden sprayer or humidifier produces droplets over 20 µm. They rain down directly below the machine, leaving the corners dry.
The solution itself is more than just peroxide. Many professional systems, like the Halo Disinfection System, use a blend of hydrogen peroxide and silver ions (Ag⁺). The silver acts as a catalyst, increasing the generation of hydroxyl radicals, the highly reactive species that actually shred DNA and proteins. It also stabilizes the peroxide, preventing it from breaking down too quickly in the storage bottle. You get a 6-log kill rate, that’s 99.9999% reduction, with a lower, gentler peroxide concentration.
TL;DR: Aim for a 4-6 µm aerosol from a professional nebulizer, not a coarse spray. A 5% H₂O₂ + 0.01% silver ion solution can achieve a 6-log kill while being safer for materials than higher concentrations.
Fogging vs. Vapor vs. UV: The Real-World Efficacy Numbers
You have three main options for whole-room disinfection: hydrogen peroxide fogging, hydrogen peroxide vapor, and ultraviolet (UV-C) light. They are not interchangeable. Your choice dictates your kill rate, your process time, and what you can leave in the room.
| Technology | Mechanism | Typical Log Reduction | Cycle Time (50m³) | Biggest Limitation |
|---|---|---|---|---|
| H₂O₂ Fogging | Liquid aerosol droplets settle and oxidize. | 4–6 log (with silver ions) | 2–3 hours | Droplet settling misses some vertical surfaces; longer cycle. |
| H₂O₂ Vapor | True gas condenses as micro-condensate. | 6+ log (sporicidal) | ~1.5 hours | Higher equipment cost; more sensitive to humidity. |
| UV-C Light | Electromagnetic radiation damages DNA. | 4 log (for many bacteria/viruses) | 15–45 min (per position) | Line-of-sight only; shadows block efficacy; not sporicidal. |
The numbers tell the story. An operating room H2O2 fogging study published by the NIH demonstrated a significant reduction in surgical site infections after implementation. UV light, while fast, cannot claim the same sporicidal kill because it lacks chemical contact. The EPA registers hydrogen peroxide solutions as sporicidal; it does not grant the same registration to UV devices.
Common mistake: Choosing UV because it’s faster, the 15-minute cycle is per emitter position. To cover a patient room with a single unit, you must move it 3-4 times, making the total hands-on time over an hour, and you still have zero assurance about the inside of a drawer or the underside of a bed.
Material compatibility is the silent killer. Prolonged UV exposure degrades plastics and rubber, think of a garden hose left in the sun. Hospital equipment knobs and seals crack. Hydrogen peroxide, especially the silver-ion formulations, is broadly compatible. You can leave monitors and keyboards in the room. For a facility managing a fleet of sensitive portable fogging units and other electronic gear, this compatibility is a capital expenditure safeguard.
The 4-Step Fogging Protocol (And the Step Everyone Rushes)
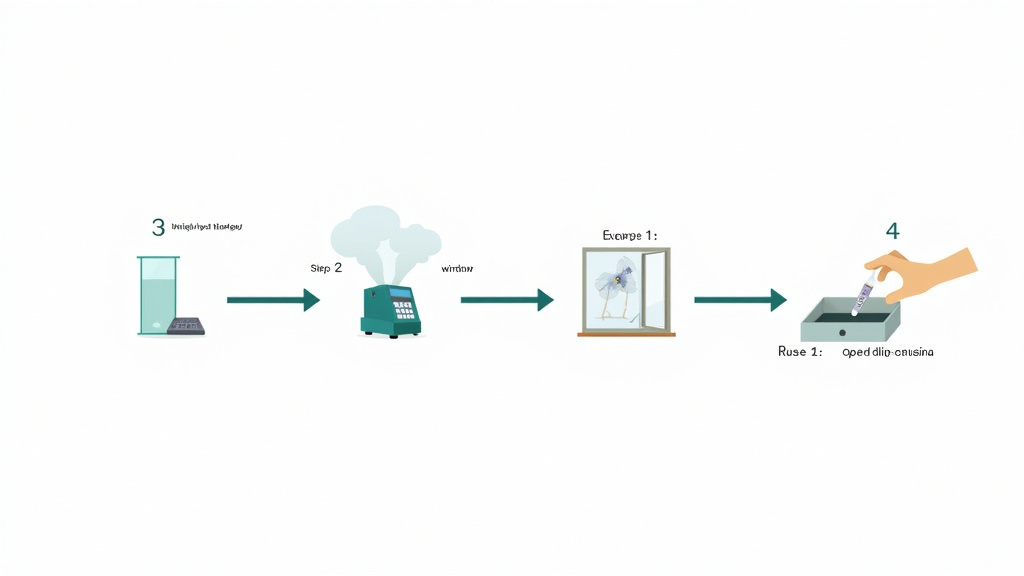
You can have the best machine and solution, but a bad process yields a bad result. This is the sequence that works for a standard patient or lab room.
Before you start: Seal the room. Close all doors, windows, and HVAC vents with tape. Cover or remove extremely sensitive items like uncovered paper documents or certain optical lenses. Put on your nitrile gloves and safety goggles before you even touch the solution bottle.
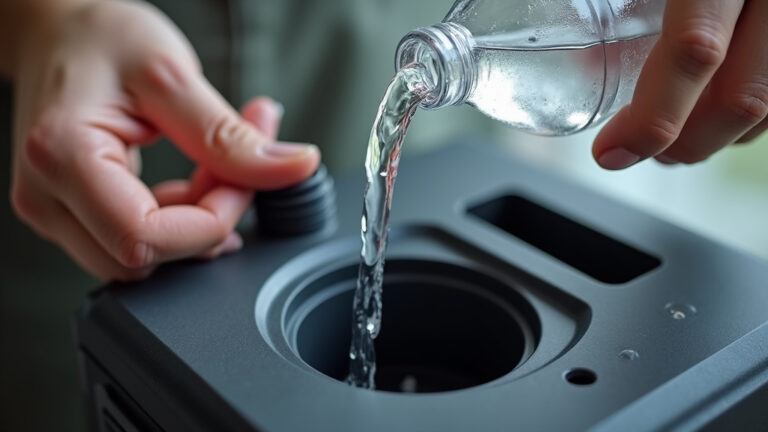
Step 1: Calculate and Load the Solution
Don’t guess. The dosage is based on room volume. For a 5% hydrogen peroxide, 0.01% silver ion solution, a common target is 10-12 mL per cubic meter of space. For a 4m x building5m x building3m room (60m³), you need 600-720 mL of solution. Use a graduated cylinder or the machine’s marked reservoir.
What happens if you skip it: Under-dosing leaves areas with sub-lethal concentrations. Pathogens survive, and you’ve just trained them to resist peroxide. Over-dosing wastes money, extends aeration time, and can damage some materials.
Step 2: Position the Fogger and Start the Cycle
Place the unit centrally, on a chair or cart, about waist-high. Plug it in. Start the machine and exit immediately. Seal the door behind you. Post a warning sign.
The fogger will run for 20-40 minutes to disperse the entire volume. Then the dwell period begins. This is the contact time where the droplets sit wet on surfaces, doing the killing. The total cycle time is dispersal + dwell. A typical dwell is 60 minutes.
Common mistake: Cutting the dwell time short because the room “looks clear”, the peroxide is still active on surfaces. Re-entering early exposes you to irritant levels of H₂O₂ and halts the disinfection. The timer is the boss.
Step 3: Aerate the Room
After the cycle completes, open the door and windows. Turn the HVAC back on. Use fans to actively exchange air. Aeration time depends on the dose and room size, but plan for at least 30-60 minutes. Some advanced systems use vacuum-aeration (VA) to actively pull the atmosphere out, cutting this time in half.
You’re waiting for the peroxide concentration to fall below 1 part per million (ppm), the general occupational exposure limit. If you smell a sharp, bleach-like odor, it’s not yet safe.
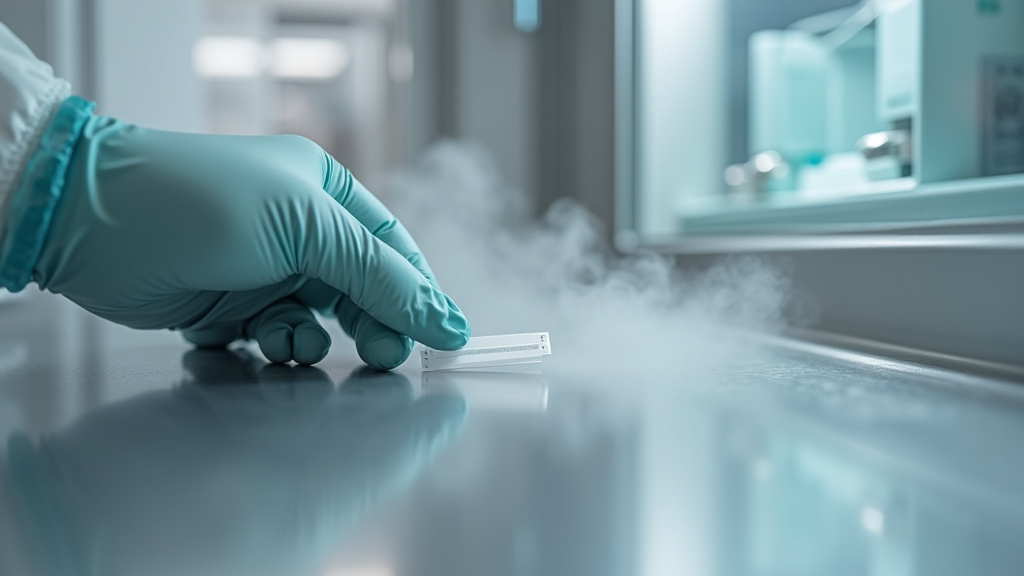
Step 4: Validate with Biological Indicators
This is the step labs never skip and hospitals often wish they didn’t. Place biological indicators (BIs), small strips or discs inoculated with Geobacillus stearothermophilus spores, in the worst-case locations before fogging: inside a slightly open drawer, under a bed, facing away from the fogger.
After aeration, retrieve them and incubate. If they show no growth, you’ve proven a 6-log reduction. This data is your validation record. Without it, you have no proof the fogging did anything more than a thorough wiping would have.
Choosing a Fogging Machine: Nebulizer vs. Thermal vs. DIY
Not all foggers are equal. The technology defines the particle size, which defines the coverage.
| Fogger Type | How It Works | Particle Size | Best For | Cost Range |
|---|---|---|---|---|
| Ultrasonic Nebulizer | Piezoelectric disc vibrates at high frequency, shattering liquid into fine mist. | 4–6 µm | Professional healthcare, labs, GMP areas. High efficacy. | $$$ |
| Thermal Fogger | Heats solution to create a vapor/ aerosol mix. | Variable, often 1–10 µm | Large spaces like warehouses, food processing. Can use thicker solutions. | $$ |
| Compression (Cold) Fogger | Pump forces liquid through a fine nozzle. | 10–30+ µm | Outdoor mosquito control, agricultural uses. Too coarse for indoor disinfection. | $ |
| DIY (e.g., Electric Frying Pan) | Heats diluted solution in an open pan; evaporation and convection create a crude vapor. | Uncontrolled, large droplets | Extreme budget constraints, non-critical spaces. No validation possible. | $ |
The ultrasonic nebulizer is the gold standard for a reason. It produces a consistent, fine aerosol without heat, which is crucial for temperature-sensitive silver-ion blends. When researching disinfectant fogger machines, look for a specification sheet that lists “mass median aerosol diameter” or “particle size distribution.” If it doesn’t have one, it’s not a professional medical device.
I tried a thermal fogger with a silver-ion peroxide solution in a small server room. The heat plate degraded the stabilizers in the solution by the third cycle. The next batch fogged with that machine left a brownish residue on the white server cabinets. I now use only piezoelectric nebulizers for any formulated chemistry.
For a small business or homeowner dealing with a mold issue in a basement, the DIY electric pan method has a place. You pour a 6.
7% peroxide solution into a cheap electric frying pan, set it to low, and leave it in the sealed room for several hours. It creates a wet, oxidizing environment that will kill surface mold. But you cannot validate it, you cannot control the concentration, and the humidity damage to drywall may outweigh the benefit. It’s a method of last resort, not a plan.
The Non-Negotiable Safety and Validation Framework
This is where recreational fogging and professional disinfection diverge completely. If you are fogging in a regulated environment, a hospital, pharmacy cleanroom, or food production line, you operate under a quality framework. Your PMC hydrogen peroxide fumigation guide is your starting textbook.
The Validation Obligation
You must prove your process is effective, reproducible, and appropriate for the specific microorganisms you’re targeting. A study for C. difficile doesn’t automatically validate for Aspergillus mold.
The validation protocol has three parts:
1. Installation Qualification (IQ): Prove the fogger and sensors work correctly in your room.
2. Operational Qualification (OQ): Show the process delivers the target concentration of H₂O₂ to all worst-case locations (using chemical indicators).
3. Performance Qualification (PQ): Demonstrate a 4-6 log kill using biological indicators placed in those same worst-case spots.
Regulators will ask for this data. Skipping it is not an option. The PLOS One gown disinfection study is an example of rigorous testing, measuring not just kill rates but also volatile organic compound (VOC) emissions post-fogging.
Personal Protective Equipment (PPE) Protocol
Hydrogen peroxide is not chlorine gas, but it’s not harmless. Concentrations above 1% can cause skin and eye irritation. The vapor/aerosol mixture during fogging can irritate the respiratory tract.
- Gloves: Wear nitrile or neoprene. Latex degrades faster.
- Eye Protection: Safety goggles with side shields. Not glasses.
- Respiratory Protection: During setup and loading, an N95 respirator is the minimum. During active fogging in a large, contained area, a full-face respirator with an organic vapor cartridge is often specified.
- Clothing: Wear a lab coat or disposable coverall. Peroxide will bleach fabrics.
The goal is zero exposure. You should smell nothing but air when you re enter after aeration. If you feel a tickle in your throat or notice your skin is red, your aeration was insufficient or your PPE was inadequate.
Frequently Asked Questions
Is hydrogen peroxide fogging safe for electronics?
Yes, with the right formulation. A 5% hydrogen peroxide solution with silver ions has broad material compatibility and is used in hospitals to disinfect keyboards, monitors, and even sensitive fog machine models for low fog without damage. Higher concentrations (e.g., 30%) or pure peroxide can corrode metals and damage some plastics.
How long does the disinfectant effect last after fogging?
Hydrogen peroxide fogging provides no residual protection. It is a one-time, terminal disinfection event. Once the peroxide breaks down into water and oxygen, the room is clean but susceptible to recontamination the moment an infected person or contaminated object enters. It is not a substitute for ongoing good hygiene practices.
Can I use regular drugstore hydrogen peroxide for fogging?
No. The typical 3% solution sold for wound cleaning contains stabilizers (like acetanilide) that are not meant for inhalation and can leave sticky residues. It is also too dilute to achieve a reliable log reduction in a fogging context. You must use a solution specifically formulated and EPA-registered for fogging disinfection.
What’s the difference between fogging and “fumigation”?
In technical parlance, “fumigation” often refers to using a true gas (like hydrogen peroxide vapor or chlorine dioxide). “Fogging” refers to dispersing a liquid aerosol. Colloquially, the terms are used interchangeably, but the efficacy difference is real, as vapor systems generally achieve more consistent coverage.
Do I need to wipe surfaces after hydrogen peroxide fogging?
Generally, no. One of the key advantages is that hydrogen peroxide breaks down into water and oxygen, leaving no toxic residue. A light wiping may be done for aesthetic reasons if any minimal water spotting occurs, but it is not required for disinfection purposes. Always check the manufacturer’s instructions for your specific solution.
Before You Go
Hydrogen peroxide fogging is a powerful tool, but it’s not magic. Its strength lies in the combination of a validated chemical agent, a machine engineered to deliver it as a fine aerosol, and a disciplined protocol that includes safety and proof of efficacy. For killing resilient spores like C. difficile in a healthcare setting, a professional system with a silver-ion formulation is the benchmark.
For smaller-scale or non-critical needs, like mitigating mold in a basement, simpler methods exist, but manage your expectations, you are creating a hostile environment, not executing a validated kill. Always prioritize safety: seal the space, wear your goggles and gloves, and aerate until the air smells of nothing at all. Your lungs will thank you.