Have you ever wanted to take your Halloween decorations to the next level? Or perhaps you want to add some extra flair to your next party or event. Whatever the situation, a fog machine can be a great way to set the mood. With some simple supplies and components, you can make your own fog machine at home with ease!
In this guide, we’ll take you through the process of putting together a DIY fog machine, from gathering the parts and supplies needed to assembling and testing it. So let’s get started creating your very own fog machine!
What is a Fog Machine
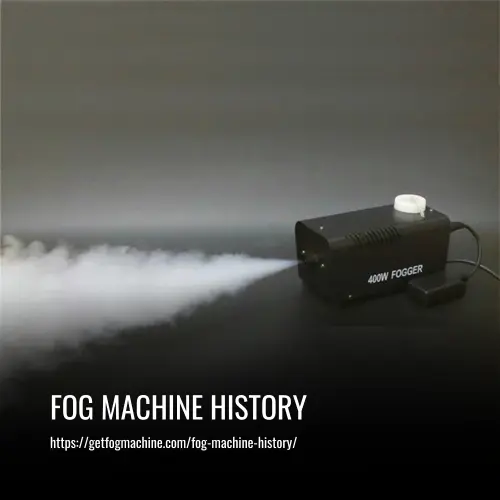
A fog machine is a device that produces an artificial fog or mist, often used in theatrical productions or to add an extra element of atmosphere to parties and events. Typically, these machines are electrically powered and work by heating up a solution of water and chemicals to create the desired effect.
Commercial fog machines come in various sizes and can produce different types of effects, depending on the type of fog juice used. In addition to commercial models, DIY fog machines can be constructed out of relatively inexpensive parts and components, making them a great option for those looking for an affordable way to add some extra atmosphere to their event.
Why Make a Fog Machine
Creating your own fog machine is a great way to add an extra element of atmosphere to any event or gathering. Whether you’re looking for that spooky vibe for your Halloween party, or just want to impress your guests with a unique effect, fog machines are a relatively easy and cost-effective way to get the desired results.
Not only can DIY fog machines be constructed from inexpensive parts and components, but they also offer more versatility than most commercial models. With the ability to customize the type of fog juice used as well as the amount of smoke produced, a homemade fog machine can provide just the right atmosphere for any occasion.
Parts and Supplies Needed
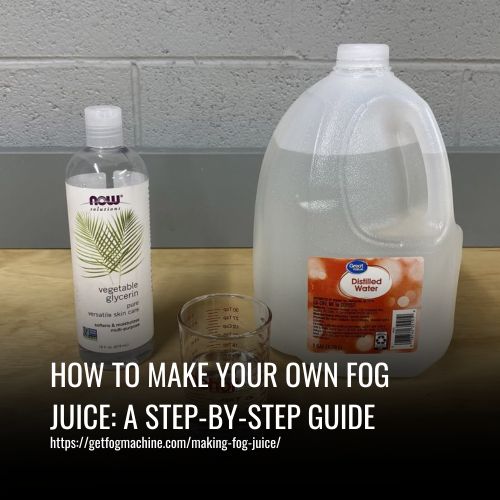
Creating a fog machine is an easy and cost-effective way to add atmosphere to any event. To get started, you’ll need to gather the necessary parts and supplies. Distilled water, hot water, and commercial fog juices are all essential ingredients.
Depending on how much fog you want to create, you may also need teaspoons of fog juice and an airtight container for storing it in. For the actual construction of your machine, you’ll need duct tape, electrical tape, a multi-wick candle, hot glue, and possibly larger amounts of each depending on the size of your project.
Lastly, an ultrasonic atomizer will be needed to convert the liquid into a cloud of misty vapor. With all these components in hand, you’re ready to begin building your own customized fog machine!
Components of a Fog Machine
Creating your own fog machine is a great way to add atmosphere to any event. You will need an ultrasonic atomizer, distilled water, hot water, commercial fog juice, duct tape, electrical tape, and a multi-wick candle. Depending on the size of your project you may need more of each item.
Hot glue is also recommended for the construction of the fog machine. To ensure that the liquid is converted into a cloud of misty vapor, an airtight container must be used to store the fog juice while you are constructing the machine.
Be sure to follow all safety instructions when building and using your new fog machine! With all these components, you can now create your own customized fog machine with ease!
Typical Supplies Needed for Making a Fog Machine
Typical supplies needed for making a fog machine include an ultrasonic atomizer, distilled water, hot water, commercial fog juice, duct tape, electrical tape, and a multi-wick candle. Depending on the size of the project, more of each item may be required.
Hot glue is also recommended to ensure that all components are sealed properly and securely. The most important part of constructing a fog machine is using an airtight container to store the fog juice while you work. This helps ensure that the liquid will convert into misty vapor when used.
Following all safety instructions when constructing and using your fog machine is essential for success and safety. With these supplies in hand, you can easily create your own customized fog machine.
Assembling the Fog Machine
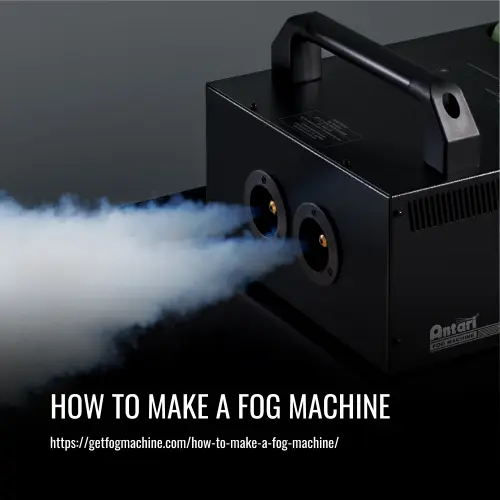
Assembling a fog machine is relatively simple and straightforward. Begin by attaching the ultrasonic atomizer to the container using duct tape or hot glue. Make sure that the atomizer is well secured to prevent any leakage or breakage.
Then, fill the container with distilled water and add two teaspoons of commercial fog juice per gallon of water. The ratio of fog juice to water may be adjusted depending on desired thickness and output from the fog machine.
Connect the multi-wick candle to the container using electrical tape and secure it with machine screws for extra safety. Once your fog machine has been assembled, plug it in and turn it on! You should now have a fully functioning fog machine ready for use!
Preparing the Components and Supplies
Before beginning the assembly process, it is important to make sure that you have all of the necessary components and supplies. Depending on what type of fog machine you are building, these may include a container, ultrasonic atomizer, multi-wick candle, electrical tape, hot glue or duct tape, distilled water, and commercial fog juice.
Many hardware stores carry pre-packaged fog juice in small amounts – usually two teaspoons per gallon of water. If you plan on making larger amounts of fog machine juice, it is recommended to purchase commercial fog juices from specialty retailers.
Additionally, for an even more affordable option consider using tap water instead of distilled water. Once all components and supplies are in place, you can begin assembling your fog machine!
Connecting the Electrical Wires and Electronics
The next step in building a fog machine is to connect the electrical wires and electronics. If you are using a commercial fog machine, the wiring should already be complete with a foot switch connected to the power source. However, if you are creating your own fog machine, then you will need to install the wiring and electronics yourself.
Start by connecting the atomizer to the power source. Use either machine screws or electrical tape to secure the connections and make sure they are airtight. Once all of the wirings are installed, it’s time to connect the multi-wick candle.
This will allow you to control how much fog is released at once. Finally, plug in your foot switch and test out your new fog machine! With these simple steps, you can create an affordable yet versatile fog machine that can be used for a variety of applications.
Setting Up the Hot Glue Wick System
The hot glue wick system is an important part of any fog machine. This will ensure that the fog released from your machine is smooth and consistent. To set up the hot glue wick system, start by squeezing a generous amount of hot glue onto a flat surface.
Allow the glue to cool and become tacky before carefully placing the wick into the hot glue. Once the wick has been secured in place, use duct tape or a similar adhesive to secure it to the bottom of your fog machine.
Finally, fill your airtight container with distilled water or tap water and add 2-3 teaspoons of fog juice for larger amounts of fog output. Your hot glue wick system should now be ready to use! With this setup, you can enjoy reliable and consistent fog production with your DIY fog machine.
Testing the Fog Machine Setup
Once the setup is complete, it’s important to test the fog machine before use to ensure that it works properly. To begin testing your fog machine, place it on a flat surface and plug it into a power source. Ensure that all safety features are in place and then turn the switch on to activate the machine. If your model includes a remote or foot switch, be sure to test that as well.
Once everything is powered up, take some time to observe how much smoke is produced and how quickly it disperses. If you find that there isn’t enough smoke being produced, try adjusting the output settings or adding more fog juice.
With proper adjustments, you can easily customize your fog production to fit your needs. Testing your setup beforehand will help ensure that you get the best results when using your DIY fog machine!
Additional Considerations for Using a DIY Fog Machine
When using a DIY fog machine, there are some additional considerations to keep in mind. First, when using tap water or distilled water instead of commercial fog juices it is important to clean the fog machine’s reservoir after each use and replace the water with fresh water every few uses.
This will help prevent bacterial growth and clogs from forming, ensuring your DIY fog machine lasts for many uses. Additionally, if you are making larger amounts of smoke for events or parties, consider investing in an ultrasonic atomizer that can produce more smoke than the traditional hot water method.
Finally, be sure to use only non-flammable materials when constructing your DIY fog machine, as this will help reduce the risk of fire or other accidents when working with electricity. By following these guidelines and taking all necessary precautions, you can ensure a safe and successful experience while using your DIY fog machine!
Safety Precautions when Using Fog Machines
When using fog machines, it is important to take safety precautions in order to prevent injury and accidents. First, ensure that the fog machine is placed on a flat, non-flammable surface away from any combustible materials.
It is also important to check the manufacturer’s instructions for the proper use of the machine, including maximum output levels and placement requirements. Additionally, always wear protective gear when working with fog machines as particles may irritate skin or eyes.
Finally, use only approved fog juice or smoke fluid that is specifically designed for use with fog machines. By following these safety tips, you can help ensure a safe and successful experience while using your fog machine!
Other Options for Creating Fogs or Smoke Effects
Creating fog or smoke effects can be achieved in a variety of ways. For smaller amounts, an inexpensive fog machine and commercial fog juices are all that are needed. To make larger amounts, an ultrasonic atomizer or a multi-wick candle can be used in combination with hot water, distilled water, and teaspoons of fog juice.
To store the liquid, an airtight container such as a mason jar should be secured with duct tape or electrical tape. For more permanent solutions, hot glue can also be used to attach the wick to the container. There are also commercial smoke machines available for those looking for a more professional result.
No matter which method you choose, with the right supplies and a little bit of creativity, you can easily create amazing fog or smoke effects!
Conclusion
Creating fog and smoke effects can be a fun and rewarding experience, but it is important to remember that there are various methods available. Depending on the desired size of the effect, one of many options should be chosen.
For smaller amounts, an inexpensive fog machine with commercial fog juices will suffice. If a larger effect is desired, then an ultrasonic atomizer or multi-wick candle can be used in combination with hot water, distilled water, and teaspoons of fog juice.
Alternatively, for a more professional result, a commercial smoke machine may also be used. No matter which method is chosen, with the right supplies and some creativity amazing results, can easily be achieved!