Learn How to Make a Fog Chiller Using 3 Proven DIY Methods
This post contains affiliate links. As an Amazon Associate, we earn from qualifying purchases.
To make a fog chiller, you need a sealed container, a cooling medium like ice, and tubing to guide hot fog through the cold environment. The three proven designs are a coiled-hose chiller for maximum cooling, a simple chamber chiller for quick setup, and a fan-assisted chiller for directed output. Match the design to your fog machine’s output and the size of your area.
Most builds fail because they ignore residence time. Fog needs seconds of contact with cold, not a quick pass over a few cubes. A leaky seal or a short hose coil kills the effect before the first trick-or-treater arrives.
This guide walks through each design with specific parts lists. You will learn how to seal it right the first time, choose between ice and dry ice, and troubleshoot when the fog refuses to stay low.
Key Takeaways
- The coiled-hose design cools fog most effectively by maximizing contact time inside a trash can filled with ice.
- Use silicone caulk, not just duct tape, to seal all input/output holes; air leaks destroy the temperature differential.
- For ground-hugging fog that lasts, pair your chiller with a low-lying fog juice formula designed for cooler temperatures.
- Dry ice cools fog to -109°F but requires insulated gloves and must never be sealed in an airtight container.
- A small 12V computer fan attached to the output tube can push chilled fog 10-15 feet across a driveway or walkway.
Why a Fog Chiller Works (The Physics Most Guides Skip)
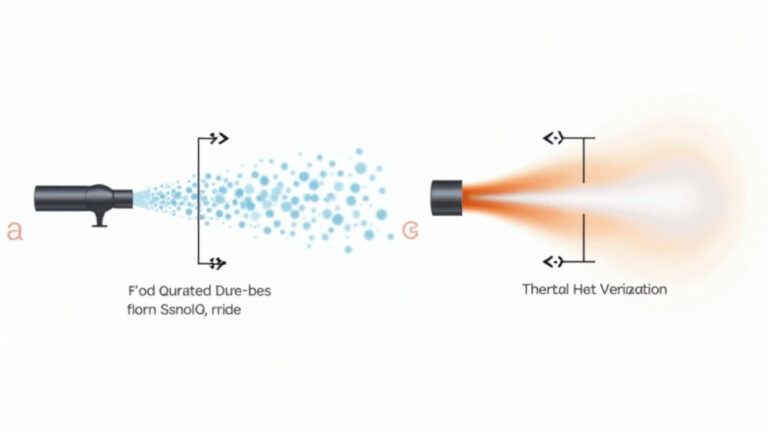
Hot fog from a machine is less dense than air. It rises immediately. A chiller works by exploiting a simple physical rule: cold air sinks. When you force the hot fog vapor through a cold space, it condenses. The water droplets in the fog get heavier.
This isn’t just about making fog cold. It’s about increasing its density. Dense fog lacks the thermal energy to rise. It pours out of the chiller and rolls along the ground, clinging to surfaces.
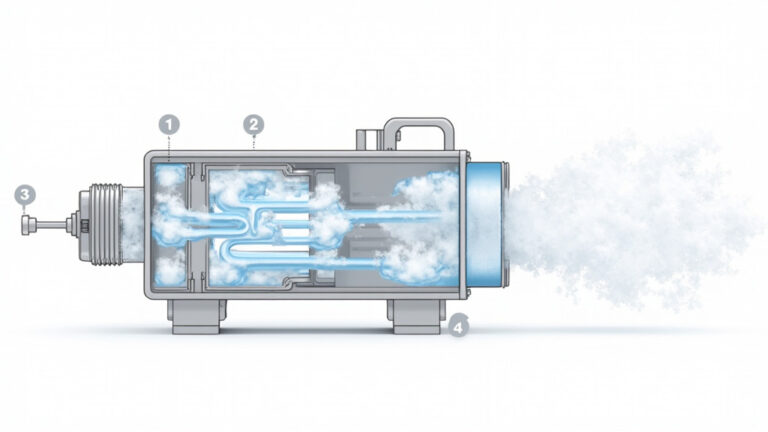
The critical variable is residence time. If the fog spends half a second sliding past an ice cube, it barely chills. It needs to languish in the cold for several seconds. The coiled-hose design, where the fog travels through 10-15 feet of tubing buried in ice, achieves this. A simple chamber where fog billows over ice works, but for a shorter duration.
Fog output temperature from a well-built chiller should be 15-20°F below ambient air temperature. With dry ice, you can achieve a 40-60°F drop. Measure the output with an infrared thermometer about 6 inches from the exit hole.
The 3 Core Fog Chiller Designs Compared
You have three reliable paths. The best one depends on your budget, time, and how long you need the effect to last.
| Design | Best For | Core Principle | Build Time |
|---|---|---|---|
| Coiled-Hose Chiller | Maximum effect, long parties | Fog travels through a long hose coiled inside ice, maximizing cooling contact time. | 90 minutes |
| Simple Chamber Chiller | Quick setup, smaller areas | Fog enters a chamber, billows over ice, and exits from the bottom. Less residence time. | 30 minutes |
| Fan-Assisted Chiller | Directed output, covering distance | A computer fan at the output pushes the chilled fog along a hose or across a specific zone. | 120 minutes |
The coiled-hose method wins for pure performance. It’s the design that took first prize in a Make: magazine competition. The simple chamber is your “tonight’s the party” emergency build. The fan-assisted version is for when you need to fill a 20-foot long grave line or a winding path.
TL;DR: For a permanent, reliable prop, build the coiled-hose chiller. For a last-minute fix, use the simple chamber. Add a fan if you need to push fog more than 8 feet.
What You’ll Need: The Non-Negotiable Tools and Materials
Gather this first. Substituting the wrong sealant or hose type is the main reason for first-build failure.
Tools:
- Electric drill
- Hole saw bit (size matched to your tubing)
- Utility knife or box cutter
- Caulking gun
- Measuring tape
- Safety goggles
Materials (Coiled-Hose Design):
- Rigid plastic or metal trash can (20-30 gallon)
- 10-15 ft of flexible aluminum dryer hose (4-inch diameter)
- Two 4-inch PVC pipe couplers or ducting clamps
- High-temperature silicone sealant
- Duct tape
- 35-50 lbs of ice (or 10-15 lbs of dry ice with gloves)
The hose must be aluminum, not vinyl. Vinyl dryer hose kinks and collapses when coiled. Aluminum holds its shape. The silicone sealant must be rated for temperature extremes; standard window caulk cracks.
Common mistake: Using a flimsy vinyl hose — it kinks shut inside the ice, blocks all fog, and overheats the fog machine’s pump within three minutes.
Step-by-Step: The Coiled-Hose Chiller
This is the performance build. Follow the sequence.
1. Prepare the Container.
Clean and dry a 20-gallon trash can. Mark two holes: one 3 inches from the top, another 3 inches from the bottom on the opposite side. The top hole is the input. The bottom hole is the output.
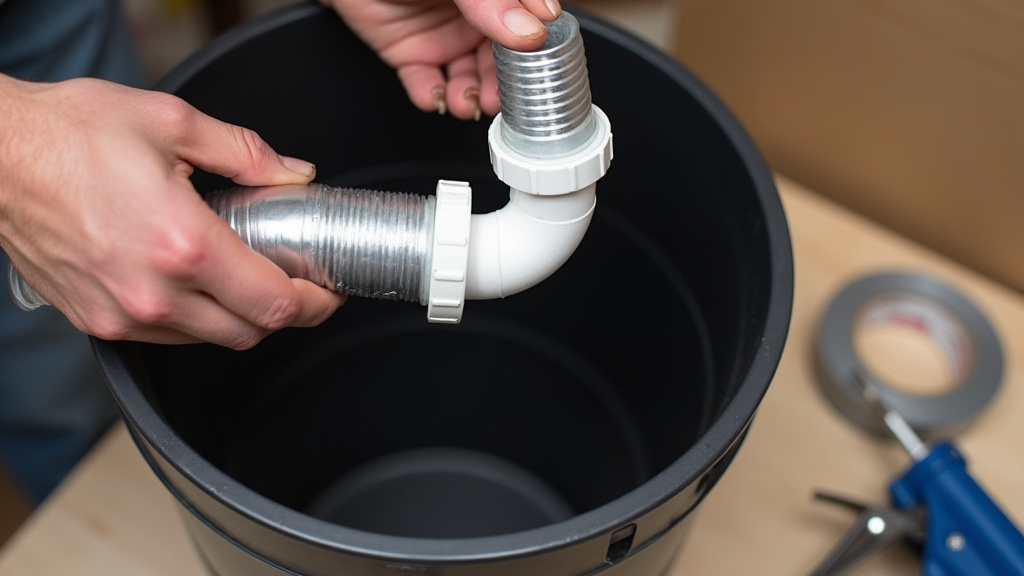
2. Cut the Holes and Install Couplers.
Drill the holes using the hole saw. The size must match your dryer hose’s outer diameter for a snug fit. Slide a PVC coupler into each hole from the outside. Seal the gap between the coupler and the trash can wall with a thick bead of silicone caulk, inside and out. Let it cure for an hour.
3. Coil the Hose Inside.
Feed the aluminum dryer hose through the top coupler. Slowly coil it inside the can, keeping the coils loose and even. Avoid sharp bends. The goal is to fill the can’s volume with hose. Feed the end of the hose out through the bottom coupler. Leave about 6 inches of hose protruding from each coupler.
4. Seal Everything.
This is the most important step. Apply silicone sealant around the hose where it enters each coupler. Wrap the joint with duct tape for mechanical security, but know the silicone is the real seal. Ensure the lid of the trash can also seals tightly; use foam weatherstripping tape around the rim.
5. Test and Troubleshoot.
Before adding ice, do a smoke test. Connect your fog machine to the top hose. Run a 2-second burst. Fog should only exit the bottom hose. If you see wisps escaping the lid or the coupler seals, mark the spots and re-seal with silicone. Once sealed, fill the can with ice, packing it around the hose coils. Run your machine.
The first test often reveals a weak pump. Standard 400-watt machines struggle to push fog through 15 feet of coiled hose. A 1000-watt professional fog machine works reliably. If output is weak, use shorter bursts—2 seconds on, 10 seconds off—to let the pump recover.
Ice vs. Dry Ice: The Cold Hard Truth
Your cooling medium decides the fog’s temperature, density, and how often you need to reload.
| Cooling Medium | Output Temp | Duration (20-gal) | Safety Required | Best Use Case |
|---|---|---|---|---|
| Crushed Ice & Water | 15-25°F below ambient | 45-60 minutes | Minimal | Family parties, shorter events |
| Frozen Water Bottles | 10-20°F below ambient | 90+ minutes | Minimal | Long parties where refilling is inconvenient |
| Dry Ice (Sublimating) | 40-60°F below ambient | 20-30 minutes | Insulated gloves, goggles | Photoshoots, 15-minute dramatic reveals |
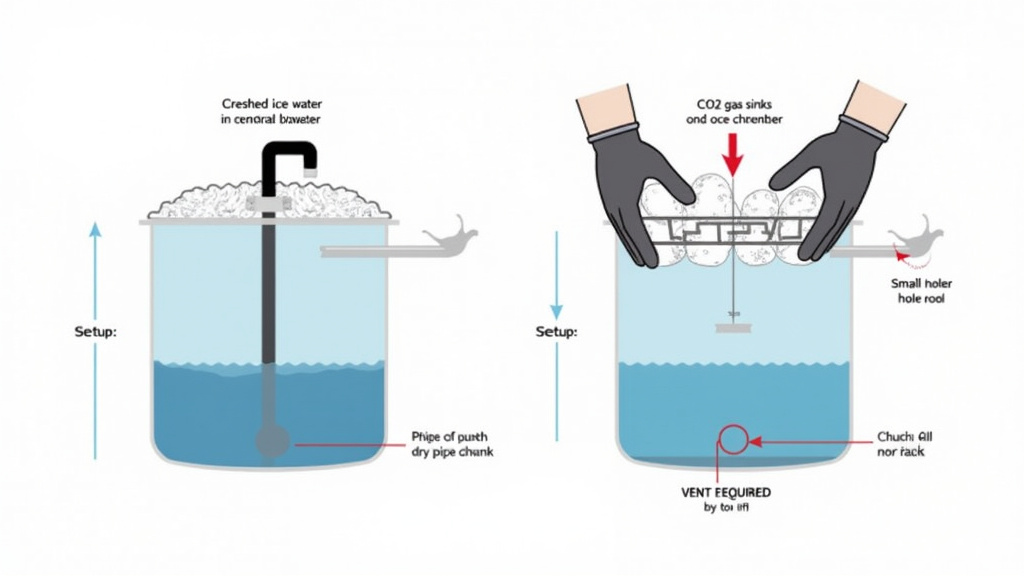
Dry ice is not a drop-in replacement. It sublimates at -109.3°F. You must use insulated gloves. Never seal it in an airtight container; the sublimating carbon dioxide gas needs a vent or it will build pressure and rupture your chiller. Place dry ice chunks on a rack above a pool of water in the bottom of your chiller. The cold CO2 gas sinks, creating the chilling environment.
I once made a chiller for a Halloween haunted trail using dry ice. I forgot to vent the lid. After 20 minutes, a seam on the plastic trash can split with a loud pop, spraying ice water and fog juice everywhere. Now I always drill a small 1/4-inch vent hole near the top of any dry ice build.
Regular ice is simpler. For the longest run time, use frozen 1-liter water bottles. They melt slower than loose ice and won’t clog drains or screens. Use about eight bottles for a 20-gallon chiller.
Pro Modifications and Troubleshooting
Your chiller works. Now make it better.
Adding a Fan for Directional Control.
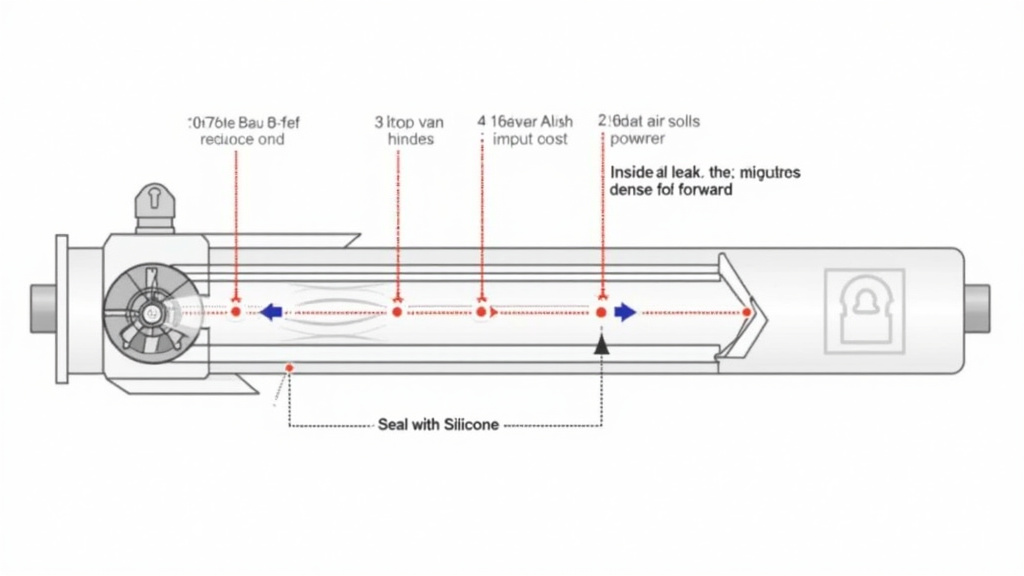
A standard 120mm PC case fan (12V) can be mounted inside the output tube. Connect it to a 9V battery pack. The fan pushes the dense fog, allowing you to aim it. This is perfect for making fog crawl out of a specific tombstone or along a fence line. Without a fan, chilled fog will only flow about 6-8 feet before dissipating.
Sealing the Ultimate Enemy: Air Leaks.
If your fog rises instead of crawling, you have a leak. The most common spots are the lid seal and the input/output couplings. Perform a leak test with the fog machine but no ice. In a dark garage or at night, run the machine. Anywhere you see fog escaping is a leak. Hit it with more silicone.
Fog Machine Compatibility.
Not all fog machines are equal. Low-output models (like 400W) work best with the simple chamber design. High-output professional fog machines (1000W+) are needed to reliably feed the coiled-hose design. Using an underpowered machine will result in weak output or pump burnout. Check our fog machine reviews for models known to pair well with chillers.
The Fluid Matters.
Standard fog juice produces fog designed to rise. For the best ground-hugging effect, use a low-lying fog juice formula. These fluids are engineered to produce denser particles that resist heat longer, complementing the chiller’s work. The difference in hang time is noticeable.
Safety First: What Can Go Wrong
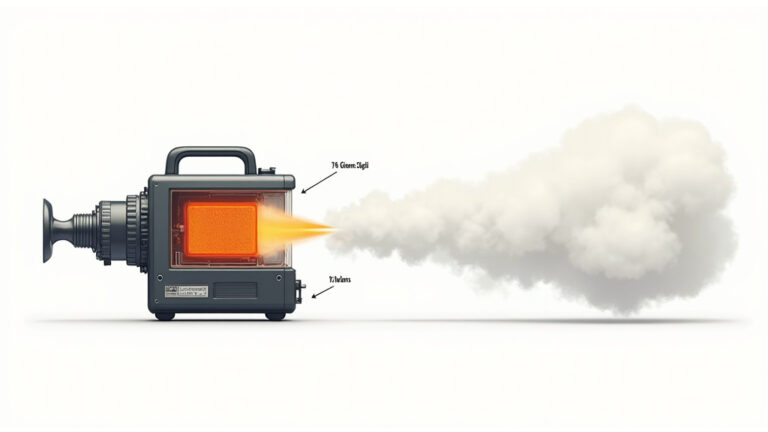
Before you start: Fog machines get hot enough to burn skin (over 130°F) on the nozzle and heating element. Let the machine cool for 30 minutes before adjusting connections. Dry ice causes severe frostbite on contact; handle only with insulated gloves. Always operate in a well-ventilated area—concentrated fog can trigger smoke alarms and obscure vision.
Electrical safety is non-negotiable. Use a GFCI outlet for any build involving a fan or pump. Keep all electrical connections away from melting ice water. If you’re adding a fan, solder and heat-shrink the connections; electrical tape will fail in the damp, cold environment.
Never use automotive antifreeze or other toxic chemicals in an attempt to lower the freezing point of your coolant. The fog machine pump can aerosolize these chemicals, creating a hazardous inhalation risk.
Frequently Asked Questions
Can I use dry ice in my regular fog machine?
No. Never put dry ice directly into the fluid tank of a standard fog machine. The extreme cold can crack the heating element and tank. Dry ice is only used inside the separate chiller chamber to cool the fog after it leaves the machine. For integrated solutions, look at dedicated dry ice fog machines.
Why is my fog chiller producing very little fog?
You likely have one of three issues: an underpowered fog machine struggling against the hose resistance, a major air leak (check seals), or a kinked hose inside the cooler. Do a leak test without ice first. If airflow seems fine, your machine may be the bottleneck.
How long will a chiller run on one load of ice?
With 35 pounds of crushed ice in a 20-gallon cooler, expect 45-60 minutes of effective chilling before the ice melts enough to reduce performance. Using eight frozen 1-liter water bottles can extend that to 90 minutes or more, as they melt slower.
Can I use a fog chiller indoors?
It is not recommended. Even chilled fog is primarily water vapor and glycol-based fluid. It will increase humidity significantly, potentially damaging electronics, walls, and flooring. It can also set off sensitive smoke alarms. Always use outdoors or in very large, industrial-style venues with proper ventilation.
What’s the best fog juice to use with a chiller?
For the densest, longest-lasting ground fog, use a fluid specifically labeled for low-lying effects. These specialized low-lying fluids have a different chemical composition that creates heavier particles. Standard fluid will work, but the fog won’t cling to the ground as long.
The Bottom Line
Building a fog chiller transforms a basic Halloween setup. The coiled-hose design is the benchmark for a reason—it works. Spend your time on the seals, not the aesthetics. A perfectly sealed, ugly cooler beats a leaky, spray-painted masterpiece every time.
Match your machine to the design. Remember that the right fog juice for low fog is as important as the chiller itself. Start with ice, master the basics, and then experiment with a fan or dry ice for your second build. The fog will roll.