How to Get Rid of Dry Ice: The Safe, No-Damage Method
This post contains affiliate links. As an Amazon Associate, we earn from qualifying purchases.
To get rid of dry ice, you let it sublimate, turn directly from solid to gas, in a well-ventilated outdoor area. Wear insulated gloves, place the dry ice in a vented container like a cracked-open Styrofoam cooler, and leave it outside, away from people and pets, for 18 to 24 hours until it completely disappears.
Most guides make this sound like a simple chore. They skip the part where a sealed container becomes a bomb in your garage, or where a single piece dropped on a tile floor cracks it like glass. The real risk isn’t the cold itself; it’s the gas you can’t see and the pressure you don’t feel until something breaks.
This guide walks through the only method that works without damaging your property or putting anyone at risk. We’ll cover the exact gear, the one right container, the three places you must never put dry ice, and what to do if you accidentally touch it.
Key Takeaways
- Dry ice isn’t trash; it’s solid carbon dioxide that expands 600 times as it turns to gas. Sealing it in anything airtight creates explosive pressure.
- Insulated gloves are non-negotiable. Leather or cryogenic gloves work. Kitchen mitts or disposable nitrile gloves do not, they transfer the -109°F cold in under five seconds.
- The only safe disposal container is ventilated. A Styrofoam cooler with the lid slightly ajar is perfect. A sealed trash bag or plastic bottle will rupture.
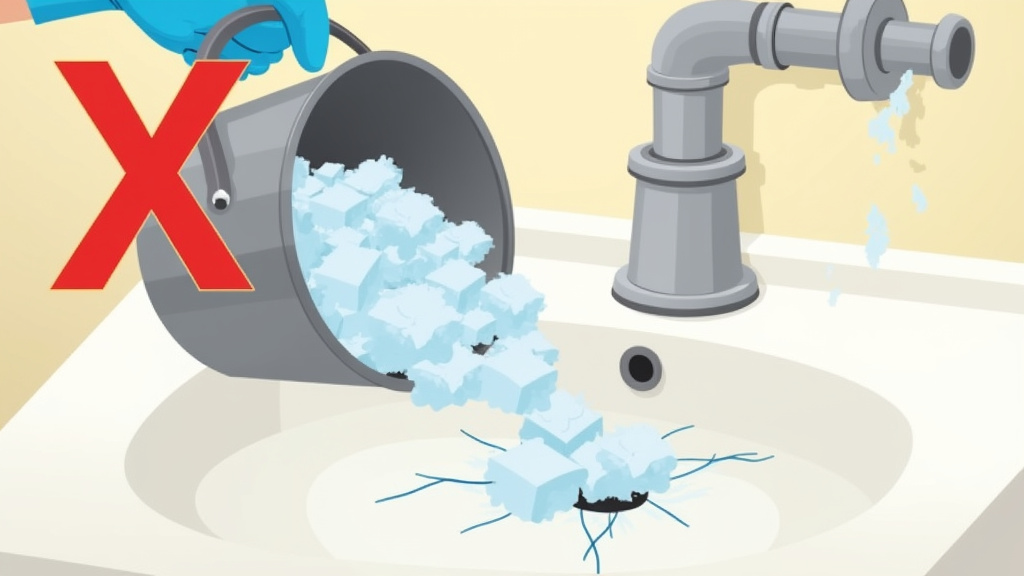
- Never dispose of dry ice in a sink, toilet, or drain. The extreme thermal shock will crack PVC, copper, or ceramic pipes. The repair bill starts at hundreds of dollars.
- Sublimation is passive. Trying to speed it up with hot water creates a dense, low-lying fog of CO2 gas that can displace oxygen in a basement or garage, leading to asphyxiation.
The One-Step Disposal Method (It’s Not What You Think)
You don’t “dispose” of dry ice. You manage its phase change from solid to gas. This process, called sublimation, is the entire game. Fighting it causes every common accident.
Dry ice sublimates at -78.5°C (-109.3°F) at standard atmospheric pressure. This phase change directly from solid to gas releases pure carbon dioxide, which is 1.5 times heavier than air and will accumulate in low, unventilated spaces, displacing breathable oxygen.
Your job is to give that gas an escape route while protecting yourself from the solid. The sequence is simple, but the consequences for skipping a step are immediate.
Step 1: Suit up with real protection.
Grab insulated leather work gloves or dedicated cryogenic gloves. Put on a long-sleeved shirt, closed-toe shoes, and safety glasses. I learned this the hard way during a Halloween setup years ago. I used a thick oven mitt to move a 5-pound block. The mitt was quilted cotton, great for 400°F, terrible for -109°F. The cold shot straight through. A blister the size of a dime formed on my palm in ten seconds. It took three weeks to heal. Kitchen gear fails.
Step 2: Choose the right container.
A Styrofoam cooler is ideal. Its insulation slows sublimation slightly, giving you control, and it’s easy to vent. Place the dry ice inside and rest the lid on top without snapping it shut. Leave a one-inch gap. A lidded plastic storage bin works if you drill a few quarter-inch holes in the lid first. The goal is to contain the cold, not the gas.
Step 3: Place it outside, and walk away.
Take the container to a backyard, a balcony, or a well-ventilated garage with the door open. Set it on a concrete patio, a wooden deck, or the grass. Do not place it directly on finished surfaces like polished stone, sealed wood, or laminate, the cold can craze or crack them. Then leave. Do not check on it every hour. A 5-pound block will take a full day to vanish. Lingering in a confined space like a shed while it sublimates is a carbon dioxide exposure risk.
TL;DR: Gear up with thermal gloves, put the dry ice in a vented cooler, set it outside, and leave it alone for a day. Managing the gas is the only step.
Why “Let It Sublimate” Is the Only Answer
Physics dictates the rule. When dry ice warms, its molecules don’t melt into a liquid; they vibrate free directly into a gas. This expansion is violent. One cubic foot of solid CO2 becomes roughly 600 cubic feet of gas. Contain that force, and you make a bomb.
| Container Type | What Happens | Time to Failure |
|---|---|---|
| Sealed plastic soda bottle | Pressure builds until plastic ruptures, launching shrapnel. | 20–60 minutes |
| Kitchen trash bag (tied shut) | Bag inflates like a balloon, then bursts with a loud pop. | 30–90 minutes |
| Metal thermos (screwed tight) | Threads or seal fails, potentially launching the lid. | 45 minutes – 2 hours |
| Glass jar with sealed lid | Glass shatters from internal pressure or thermal stress. | 15–40 minutes |
The dry ice toxicity isn’t from poison, but from displacement. CO2 is an asphyxiant. In a closed room, it sinks and pools near the floor. You won’t smell it or see it. The first signs of overexposure are headache, dizziness, and confusion, followed by loss of consciousness. This is why the University of Pittsburgh dry ice safety guide mandates active ventilation for any indoor handling. Their institutional protocol treats unvented storage as a critical safety violation.
The environmental angle is a common question. Does dumping dry ice contribute to climate change? The CO2 released is typically a byproduct of other industrial processes, like ammonia production. You’re not adding new carbon to the atmosphere; you’re returning captured gas from a manufacturing loop. It’s considered carbon-neutral in disposal, unlike burning fossil fuels. The real dry ice hazards are acute, not climatic.
The 4 Tools That Replace a Panicked Google Search
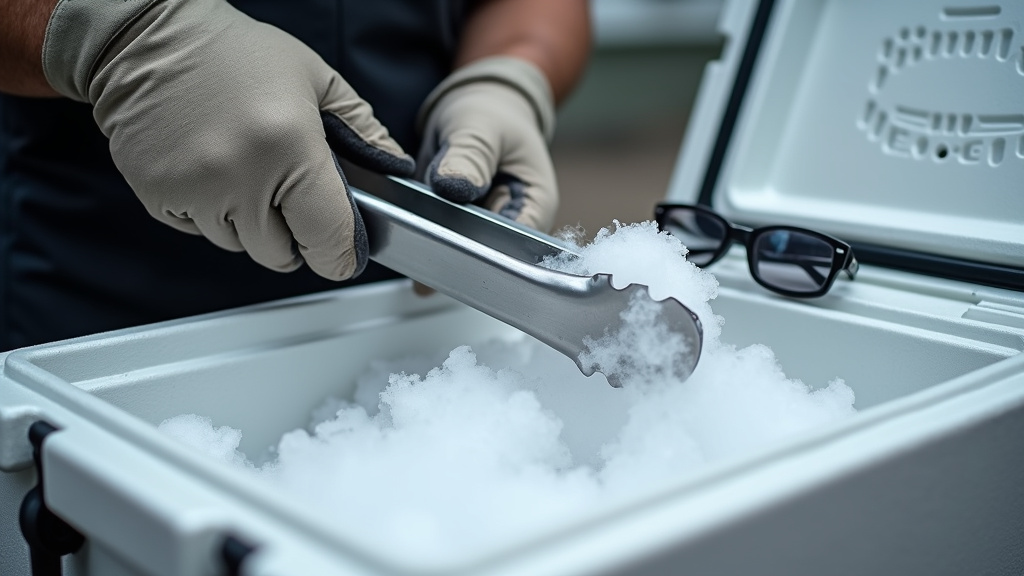
You need more than gloves. This kit handles the job without a last-minute hardware store run.
- Insulated Gloves (Leather or Cryogenic): Must be rated for extreme cold. Mechanix Wear or similar leather work gloves are a minimum. For larger blocks, proper cryogenic gloves with a insulated liner are safer.
- Vented Storage Container: A Styrofoam cooler you don’t mind sacrificing. If you use a plastic bin, drill 4-5 quarter-inch holes in the lid before you start. Never use the container for food again.
- Long-Handled Tongs or a Scoop: For maneuvering chunks without bringing your hands close. Stainless steel BBQ tongs work in a pinch.
- Safety Glasses: Basic polycarbonate glasses from the hardware store. Sublimating gas can cause frostbite to the eyes if you lean directly over the container.
Skipping the tongs seems harmless. You’ll just grab the block quickly. The problem is that dry ice “burns” through skin contact by instantly freezing cell moisture. The pain is delayed. You might not feel the damage for several seconds, by which time the frostbite is already setting in. Tongs keep your hands twelve inches away from the risk.
What NOT to Do With Dry Ice (The Costly Mistakes)
This list is shorter than the right way, but the consequences are permanent.
Common mistake: Disposing of dry ice in a sink or toilet, the thermal shock cracks the pipe at the joint or trap within two minutes. A flooded bathroom and a $500 plumbing repair is the guaranteed outcome.
Never put it down the drain.
Porcelain, PVC, and metal pipes cannot handle the instantaneous temperature drop. The contraction stress is immense. A friend of mine, a theater tech, dumped a slurry of dry ice and water down a backstage slop sink after a show. The PVC trap under the floor shattered. Water damage to the wooden subfloor and the emergency plumber call totaled over $1,200. The dry ice comparison to regular ice ends right here.
Never seal it in any container.
We covered the explosion risk. This includes dumpsters, garbage cans, and your car’s trunk with the windows up. A sealed trash can in a garage becomes a large, low-pressure vessel. When it fails, the lid can be propelled with enough force to dent drywall.
Never leave it in a public or accessible area.
Setting a block on the curb or in a public park is negligent. A curious child or pet will touch it. The resulting severe frostbite injury carries liability. The legal principle is similar to creating an attractive nuisance, you’re responsible for the foreseeable harm.
Never try to speed up sublimation recklessly.
Pouring hot water over dry ice creates that great low-lying fog effect. It also multiplies the gas release rate by a factor of ten or more. In an enclosed space like a basement, this can create a dangerous low-lying fog of CO2 in under a minute. If you’re using it for an effect, that’s a controlled dry ice fog machine scenario with planned ventilation. For disposal, it’s an unnecessary hazard. Stick with passive sublimation.
Handling Large Quantities or Business Disposal
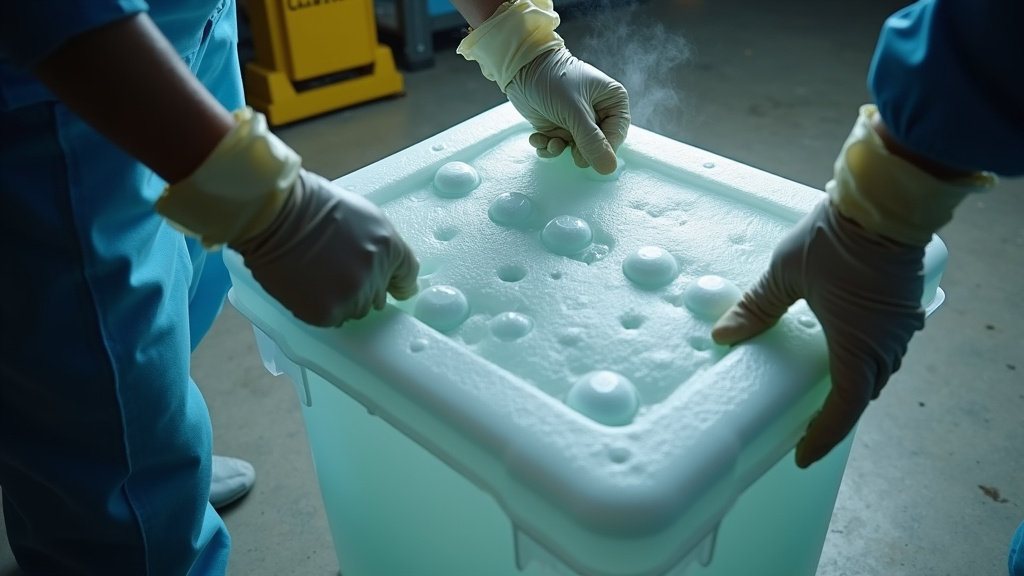
What if you have 50 pounds left over from a catering event or a scientific shipment? The principles scale, but the logistics change.
For amounts over 20 pounds, your primary tool is a large, ventilated container, think a heavy-duty plastic tote with multiple large holes drilled in the lid. The goal is to increase surface area for gas escape without letting the chunks spill out. Place this tote in a dedicated, well-ventilated storage area like a loading dock or a fenced-off section of a warehouse yard. Post clear signage: “CAUTION: DRY ICE SUBLIMATION IN PROGRESS – KEEP OUT.”
Businesses should have a written disposal procedure. It should mirror OSHA guidelines for compressed gas safety, requiring documented ventilation checks and mandatory PPE (Personal Protective Equipment) for any staff handling the material. The dry ice disposal safety procedures from institutions like the University of Pittsburgh are the model here. They treat it as a controlled hazardous material, not just leftover party supplies.
For very large volumes, you may need to contact a dry ice supplier or a hazardous waste management company. They have industrial-scale ventilated containers and can handle the sublimation off-site. This is common for pharmaceutical companies shipping vaccines or large-scale food distributors. The cost is a line item, not an option, when the liability of an in-house accident outweighs the service fee.
Frequently Asked Questions
Can I throw dry ice in the regular garbage?
No. Placing it in a trash can, even if the bag is open, is dangerous. The can itself acts as a container. As the dry ice sublimates, the heavy CO2 gas will fill the can and spill out, pooling in low areas around it. This creates an oxygen-deficient zone right where someone might lean over to throw something else away. Always use the dedicated outdoor sublimation method.
How long does it take for dry ice to disappear?
The rate depends on the surface area and ambient temperature. A solid 5-pound block in a cooler outside on a 70°F day will take 18 to 24 hours. The same weight, broken into fist-sized chunks in an open container, might sublimate in 5 to 7 hours. Breaking it up speeds the process, but increases handling risk and gas release rate, only do this outdoors with extreme caution.
What should I do if I touch dry ice?
If skin contact occurs, do not rub the area. Immediately flush the spot with lukewarm (not hot) water. Continue for 10-15 minutes. The goal is to gently thaw the frozen tissue. Do not use a heating pad or direct heat, as the numb skin can burn without you feeling it. If a blister forms or the skin turns white and waxy, seek medical attention. This is a frostbite injury.
Is the fog from dry ice dangerous to breathe?
Yes, directly. The fog is a mixture of water vapor and concentrated carbon dioxide gas. Inhaling it means inhaling a high concentration of CO2, which can lead to lightheadedness, shortness of breath, and headache. In an enclosed space, it can lead to asphyxiation. Always ensure powerful ventilation when creating fog effects, a key reason professional fog machines use water-based fluids instead.
Can I store unused dry ice for later?
You can slow sublimation, not stop it. The best home storage is in an unsealed Styrofoam cooler placed in the coldest part of a well-ventilated garage or shed. Do not store it in a household freezer. The dry ice will force the freezer’s thermostat to run continuously, potentially burning out the compressor, and the extreme cold can crack plastic shelves. Expect a 5-10% loss per day even in good storage.
The Bottom Line
Getting rid of dry ice is a test of patience, not skill. The right method is boring: gloves, cooler, outside, wait. Every “shortcut”, the drain, the trash, the sealed jar, trades a day of waiting for a genuine risk of injury, explosion, or a four-figure repair bill.
Respect the physics. That block isn’t just cold; it’s a reservoir of expanding gas waiting for a mistake. Your role is to give that gas a peaceful, uneventful exit into the open air. Do that, and the only thing you’ll lose is the ice itself.