Dry fogging is not an effective method for mold removal. While it may remove surface mold, it does not address the root system that allows mold to continue growing. Additionally, dry fogging does not kill mold spores, which are responsible for the rapid spread of mold.
As a result, dry fogging only provides a temporary solution and does not fully eradicate the mold issue. For proper remediation, it is recommended to use other mold removal methods that target the entire mold colony and prevent future mold growth.
How Does Dry Fogging Work
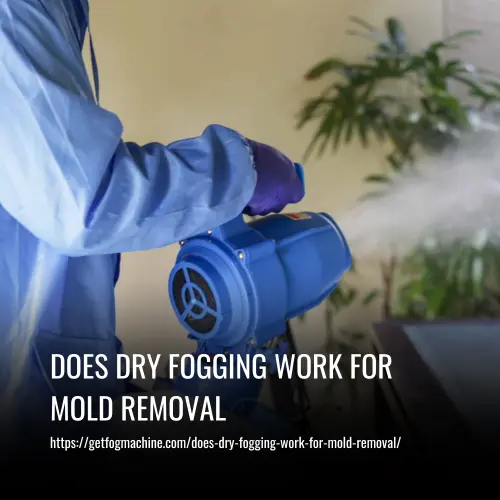
Dry fogging is a method that uses specialized machines to generate a fog or mist of tiny particles. These particles, ranging from 0.008 to 150 microns in size, are sprayed into the affected area. The fog settles on surfaces and penetrates hard-to-reach areas, attaching to contaminants and killing surface mold.
While dry fogging can be an effective solution for small areas, it is not a preventive measure against future mold growth. Additionally, it does not remove actively growing mold as it does not address the root cause of the issue.
The time taken for fogging depends on factors such as machine type, room size, and air changes per hour, with an average fogging time of around 30 minutes.
Does Dry Fogging Work for Mold Removal
Dry fogging can help remove mold from surfaces, but it does not kill mold spores in the air. While it can temporarily eliminate visible mold, the root system of the mold remains intact, which can lead to future mold growth.
Dry fogging should be used in conjunction with other mold removal methods, such as addressing the source of moisture, ventilating the affected area, cleaning and drying surfaces, and applying an EPA-registered fungicide.
It is important to have a comprehensive approach to mold removal, and consulting with a professional mold removal company is recommended to determine the most effective treatment plan for your specific situation.
Why Does Dry Fogging Not Work for Mold Removal
Dry fogging is often considered a potential solution for mold removal, but there are several reasons why it may not be effective in addressing the problem.
1. Neglecting the root cause of the issue
One of the major drawbacks of dry fogging is that it does not address the actual cause of mold growth. Mold thrives in environments with excessive moisture, and dry fogging fails to eliminate the source of this moisture. Without resolving the underlying issue, mold is likely to grow back even after dry fogging.
2. Superficial removal of mold
Dry fogging primarily focuses on eliminating mold from surfaces, rather than penetrating deep into the affected areas. This means that while it may temporarily remove surface mold, it does not eradicate the root system of the mold. Consequently, the mold can quickly return, as it continues to thrive beneath the surface.
3. Inability to eliminate mold spores in the air
Dry fogging is unable to effectively kill mold spores present in the air. This allows the airborne spores to spread and potentially cause new mold growth in other areas of the property. Without addressing the mold spores, dry fogging offers only a temporary solution.
4. Limited long-term effectiveness
As dry fogging does not tackle the root cause of the mold issue and the structural degradation associated with it, it is considered a temporary fix. The mold will continue to grow, and the structure may further deteriorate without a permanent solution.
Is Fogging for Mold Removal Safe
Fogging for mold removal can be safe if the proper precautions are taken. It is important to use a non-hazardous and biodegradable solution that is approved by the Environmental Protection Agency (EPA) for fogging. Antimicrobial pesticides should never be used, and the solution should contain non-toxic chemicals.
Proper personal protective equipment (PPE), including gloves, an overall, an N95 or half-mask respirator, and goggles, should be used during the fogging process. Hydrogen peroxide solutions can be harmful when inhaled or damage household items, so caution must be exercised. Occupants should never be present during fogging.
Water-based botanical products may not be ideal for fogging as they may fail to penetrate through mold spores and can lead to moisture problems. Therefore, it is important to assess the safety of the product and follow proper guidelines to ensure safe fogging for mold removal.
What Kind of Fogging Works for Mold Removal
When it comes to mold removal, there are several types of fogging methods that can effectively eliminate mold spores and prevent future mold growth. Here are the main types of fogging that work for mold removal:
1. Thermal Fogging
Thermal fogging utilizes a heat source to create a dense fog that can penetrate deep into surfaces. This method generates a substantial amount of fog, filling the entire room and reaching even hard-to-reach places like cracks and crevices. Thermal foggers are considered both safe and effective in mold remediation.
2. ULV Fogging
ULV (ultra-low volume) foggers use a small amount of chemicals to generate a large amount of fog. The tiny droplets created by ULV fogging can penetrate deep into surfaces and effectively kill mold spores.
3. Electrostatic Fogging
Electrostatic foggers charge the particles in the fog, causing them to stick to surfaces. This allows the fog to evenly coat all surfaces in a room, including hard-to-reach areas, effectively removing mold and preventing its regrowth.
4. Chemical Fogging
Chemical fogging involves using chemicals to create a dense fog that can penetrate deep into surfaces. This method produces a very fine fog that clings to surfaces and kills mold spores on contact.
5. Ultrasonic Fogging
Ultrasonic foggers produce a fine mist that can penetrate deep into surfaces, effectively killing mold spores upon contact.
These fogging methods are all suitable options for mold removal, providing comprehensive coverage and targeting even hard-to-reach areas. Whether using thermal, ULV, electrostatic, chemical, or ultrasonic fogging, the goal is to eliminate mold spores and prevent future mold growth for a clean and healthy indoor environment.
Do Mold Foggers Work
Mold foggers can be effective in mold removal if used correctly. There are different types of foggers available, including thermal fogging, ULV fogging, electrostatic fogging, chemical fogging, and ultrasonic fogging. Each type of fogger has its advantages and disadvantages, and it is essential to choose the right one for your needs and follow the manufacturer’s instructions carefully.
When properly used, mold foggers can effectively eliminate mold and prevent future mold growth. However, it is crucial to prioritize safety and avoid health hazards by using the appropriate protective equipment and following proper remediation procedures.
FAQs
Fogging for mold removal is a method that uses an antimicrobial pesticide in an aerosolized form to kill mold present in a property. It is a popular technique used by mold remediation companies for treating mold growth.
Fogging can be effective in killing mold spores and preventing future mold growth. The fine particles of the cleaning solution or vapor are able to penetrate cracks and hard-to-reach areas, eliminating mold and preventing its spread.
Fogging is not a temporary solution for mold removal. It can effectively kill mold spores and prevent future mold growth. However, it is important to address the underlying cause of mold infestation and perform proper remediation to ensure long-term mold prevention.
Fogging can be safe for mold removal if the chemical solution used is non-hazardous and biodegradable. It is important to check if the solution is approved by the Environmental Protection Agency (EPA) for fogging and follow proper safety procedures, such as wearing protective equipment.
Fogging for mold removal is best performed by professional mold remediation companies. These professionals have the expertise, experience, and knowledge to effectively and safely use fogging techniques for mold remediation.
Dry fog mold removal is safe when performed by professionals using approved antimicrobial solutions. The dry fog agents used are designed to neutralize mold and create a protective barrier against future mold growth. However, it is important to follow safety precautions and ensure proper ventilation during and after the fogging process.
While fogging can kill mold, it does not completely eliminate the presence of mold spores or the potential for future mold growth. The dead mold fragments that remain in the home after fogging can still cause health issues. It is recommended to physically remove fungal growth to fully address the mold problem.
There are two types of fogging: wet fogging and dry fogging. Wet fogging uses a mold fogger to spray a fine mist of cleaning solution into the air, while dry fogging releases the cleaning solution as vapor. Both methods can effectively reach hidden mold and mold spores in various areas.
Fogging for mold removal is not recommended as a DIY project. It requires knowledge of industry standards, proper use of approved solutions, and adherence to safety procedures. Professional mold remediation experts have the necessary expertise and equipment to conduct effective and safe fogging.
The manufacturer’s directions should always be followed when using a mold fogger. It is important to cover or remove delicate items that may be damaged by the cleaning solution. The fogger should be held at a proper distance from the area being fogged, and the solution should be allowed to work for the recommended time before ventilating the room.
Fumigation is a step in stopping a microbial outbreak but is not sufficient to completely eliminate mold. Once the items are fumigated, it is crucial to remove any remaining particles, spores, or mold growth from affected surfaces to prevent further issues.
Dry fogging can be safe for indoor environments if the cleaning solution used is non-toxic and biodegradable. It is important to use an EPA-approved solution specifically designed for fogging purposes to ensure safety.
Fogging can be used when the product used is registered and approved for mold remediation. It should be used according to the product registration guidelines and in compliance with proper safety procedures.
Fogging works by using a solution that suppresses and kills mold spores on contact. The solution disrupts the mold’s cell membrane, stopping them from reproducing.
While dry fogging can kill mold spores and prevent future growth, it may not completely eliminate all mold spores in the environment. Dead mold fragments may still be present and require cleaning using methods like HEPA vacuuming.
It is recommended to hire professionals for dry fogging mold removal. They have the expertise, equipment, and knowledge to ensure effective and safe mold remediation. Professionals can also provide guidance on proper preparation and follow-up actions to prevent mold reoccurrence.
For dry fogging, a fogger that produces fine particles is ideal. A dry fogger should generate particles less than 15 microns in size. Handheld foggers and stationary foggers are commonly used for mold removal.
To prepare for professional dry fogging, ensure that the area is clean and free of dust and debris. Open any closets or cabinets that need treatment. It is important to vacate the premises during the fogging process for safety and effectiveness.
Yes, cold fogging can effectively treat homes to reduce the fungal air count. This method uses misters that aerosolize a solution and spray droplets onto all surface areas, including carpets, upholstery, and curtains.
Conclusion
When it comes to mold removal, dry fogging is a powerful and effective solution. Its ability to penetrate deep into the nooks and crannies of your home, killing mold spores at their source, is unmatched.
So, if you’re looking for a safe and efficient way to eliminate mold and improve your indoor air quality, don’t hesitate to give dry fogging a try. Breathe easy and say goodbye to mold once and for all!