To make a fog chiller, you will need a Styrofoam cooler, a fog machine, ice, and a fan. Start by designing the cooler with a fog inlet and outlet. Next, create a cooling chamber inside the cooler by placing ice at the bottom and positioning a fan on top of it. Connect the fog machine to the inlet of the cooler using a flexible aluminum dryer hose.
As the fog enters the cooler, the ice will cool it down, creating a dense and spooky vapor. Finally, direct the chilled fog out of the cooler through the outlet, creating a chilling and mysterious atmosphere. This DIY fog chiller is an affordable alternative to costly fog machines and can enhance your spooky Halloween or party setup.
How Does a Fog Chiller Work
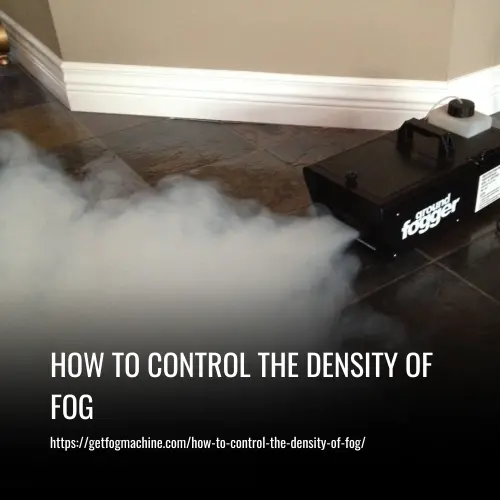
A fog chiller is a device that helps cool down the fog produced by a fog machine, creating a denser and lower-lying fog effect. The hot fog produced by a normal fog machine is often too thick and can obstruct visibility. By using a fog chiller, the warm fog is cooled down, causing it to condense and create a spooky and mysterious mood.
Making a fog chiller is easy and requires simple household items such as frozen water bottles, plastic containers or water bottles, and a few other materials. By following a few steps, you can create your own fog chiller and enhance your spooky atmosphere in just a few minutes.
Materials You Need to Make a DIY Fog Chiller
Here are some Materials You Need to Make a DIY Fog Chiller.
- Styrofoam
- Some PVC coupling
- A small fan (a computer fan works pretty well)
- Normal ice
- Duct tape
- A fog machine
- A 9-volt battery
- Fog juice
- Tools: Pliers, stapler, and a flathead screwdriver
The Design
The design of a fog chiller consists of two main parts: the cooler chamber and the fan assembly. The cooler chamber is made up of pieces of Styrofoam held together by PVC coupling, with a small hole in the top piece for the hot fog to enter. This hole is where you attach the inlet tube. The fan assembly, located at the lower end of the cooling chamber, consists of a small fan powered by a battery.
The fan helps to circulate the cold air throughout the chamber, with the outlet tube attached at the bottom. This design ensures that the hot fog is cooled down effectively, creating a spooky atmosphere.
How to Make a DIY Fog Chiller: A Step-By-Step Guide
Creating a DIY fog chiller is an excellent way to enhance your spooky atmosphere and create a mysterious mood. With just a few simple materials and easy-to-follow steps, you can transform your ordinary fog machine into a compact smoke machine that produces dense vapor and low-lying fog. Here’s a step-by-step guide to help you create your very own fog chiller:
Step 1 – Make the Styrofoam Cooler
Start by cutting the Styrofoam into four pieces. If you can find Styrofoam already in cuboid shapes, that would be ideal. Otherwise, use a knife to cut two pieces that are 14″ x 14″ and two pieces that are 12″ x 12″. These will serve as the sides of your cooling chamber.
Step 2 – Make the Holes
Next, make an inlet hole in the center of the 12″ x 12″ piece. Ensure that this hole is large enough for your inlet tube to fit through snugly. Additionally, make a small exit hole on one side of one of the 14″ x 14″ pieces. This hole will be where the outlet tube attaches.
Step 3 – Assemble the Box
Using PVC couplings, attach the two 14″ x 14″ pieces together to create a box with an open top. Repeat this process for all four sides. To seal the top and prevent smoke from escaping, you can use another Styrofoam piece or any other lid of your choice.
Step 4 – Prepare the Fan Chamber
Cut a hole in one of the 14″ x 14″ pieces that are large enough for the fan to fit through. Attach the fan to a battery using duct tape, ensuring that the wires do not touch each other. Place the fan assembly into the hole you cut earlier.
Step 5 – Install the Tubes
Attach the inlet tube to the hole on the top piece of Styrofoam, ensuring it is a snug fit. Then, attach the outlet tube to the hole on the side of the chamber, also making sure it is secure. Seal all the holes and edges with water-resistant duct tape.
Step 6 – Add Ice and Activate
Fill the chamber with approximately five pounds of ice or enough to fill it completely. Once you have added the ice, turn on the fog machine and the fog chiller. The cool air produced by the ice will sink, causing the fog from the fog machine to sink as well. The running fan will keep the fog low and force it out through the outlet aperture, creating a spooky, low-lying fog effect.
The Result
The DIY fog chiller will generate the same effect as a store-bought chiller or a ground fogger. As the fog from the fog machine enters the chiller, it mixes with hot air and expands. The cooling effect of the chiller causes the fog to sink lower into the chamber and eventually be forced out through the outlet. This creates a low-lying and dense fog for a mysterious and spooky atmosphere.
Tips
Ensure that the holes for the inlet and outlet tubes are the correct size for an efficient system. If the holes are too big, the chiller may not work effectively. Monitor the ice melting and replenish as needed to maintain a low fog level. If your room temperature is high, consider using a larger hose and placing the chiller in a colder area.
By following these simple steps, you can easily create your own DIY fog chiller, enhancing the effectiveness of your normal fog machine and creating a truly spooky atmosphere.
FAQs
Yes, it can! Any fog machine will work as long as it produces enough fog.
Using a fog chiller is the best way to keep fog low to the ground. The chiller cools the fog and makes it sink, creating a spooky atmosphere.
There are a few methods to spread fog without it rising. You can buy a fog machine that produces low-lying fog or use a fog chiller. The chiller cools the fog and makes it sink, creating a spooky atmosphere. Another option is to use dry ice, which produces dense vapor that stays close to the ground.
Since temperatures fall at night, using a fog chiller will help keep the fog low. The chiller cools the fog, causing it to sink and stay close to the ground. Additionally, you can use a fog machine that produces low-lying fog or opt for dry ice, which creates a mysterious mood in the darkness.
Conclusion
with just a few simple steps and some creativity, you can create a DIY fog chiller that will take your Halloween decorations to the next level. Whether you’re hosting a spooky party or just want to add some eerie ambiance to your yard, this fog chiller will have everyone talking.
So grab your tools and get ready to impress your friends and neighbors with your own homemade fog machine. Get ready for a chillingly good time!