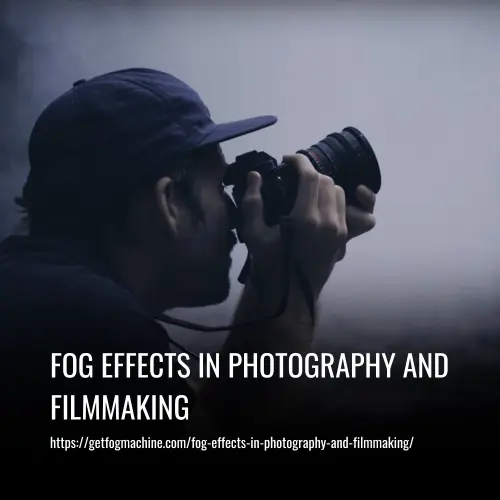
Fog effects can add depth to images and videos, creating a 3D feel even in a 2D medium. Depth of field is not always reliable, particularly in cramped spaces where long lenses cannot be used. A hazer or fog machine is a great way to achieve depth and variation between foreground and background.
However, the amount of fog used should be minimal to avoid a cheesy effect. Adding a small amount of haze can make a big difference in creating an effective image or video, particularly when working with small sensor cameras or shooting in tight spaces.
Understanding Different Types of Fog
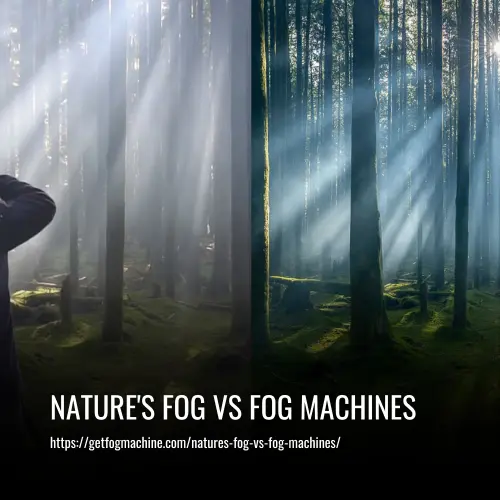
If you are looking to add a sense of atmosphere and enchantment to your photography or filmmaking, working with fog effects is an excellent technique to consider. The art of capturing the ethereal beauty of foggy landscapes or mysterious scenes requires a good understanding of the different types of fog formations and their impact on the light.
Fog formation is influenced by a range of factors, including temperature, humidity, and topography. As such, various types of fog can form under different conditions, each with its unique characteristics and implications for photography and filmmaking.
1. Radiation Fog
Radiation fog forms when the ground cools down at night, causing moisture in the air above to condense. This type of fog tends to be denser near the ground and less dense as it rises. It dissipates quickly when warmed by morning sunlight.
2. Advection Fog
Advection fog occurs when warm moist air passes over a colder surface like water or snow-covered ground. This type of fog is often found near coastlines, especially with consistent winds. Due to its horizontal nature, it can be extensive and long-lasting.
3. Valley Fog
Valley fog collects in low-lying areas surrounded by hills or mountains due to cold air sinking overnight. It creates dense pockets of fog that linger longer than other types. It can also be influenced by cold fronts moving through the area.
Working with Fog Effects in Photography and Filmmaking
Each type of fog offers unique opportunities for creating dream-like images while challenging your skills in capturing light through varying densities and persisting conditions. As you explore the potential of fog effects in your artistic vision, you must take note of the different hues, patterns, and movements that emerge within shifting mists.
1. Capturing Fog Colors
Fog colors can range from cool blue tones in early mornings or late evenings to warmer golds as sunlight filters through during sunrise or sunset hours. The right color palette can add depth and atmosphere to your shots, transporting the viewer to a world of mystery and wonder.
2. Embracing Fog Patterns
Fog patterns come to life as swirling wisps dance around trees, buildings, or other foreground elements, adding a sense of movement and depth to your compositions. You can experiment with different angles, exposure times, and shutter speeds to capture the perfect foggy scene.
3. Mastering Fog Effects for Artistic Vision
As you continue exploring the realm of photography and filmmaking enveloped by shrouds of mist, mastering various types of fog will ultimately help elevate your artistic vision. Seek out those rare moments where nature’s veil descends upon familiar scenes, opening up new dimensions for visual storytelling and creative expression.
Mastering Exposure and Focus in Foggy Conditions
When working with fog effects in photography and filmmaking, mastering exposure and focus can be both enchanting and challenging. Capturing the perfect shot in foggy conditions requires a delicate balance of technical skills and artistic flair. In this article, we’ll unveil the secrets to mastering these elements with ease.
1. Adjusting Shutter Speed
The use of shutter speed is an essential tool when working with fog effects. Slowing down your shutter speed allows more light to enter your camera, creating an ethereal glow that enhances the atmosphere of your photograph. Experimenting with different shutter speeds can help you achieve this effect.
2. White Balance Adjustments
The ever-changing hues of fog create a challenge when it comes to rendering accurate colors. White balance adjustments are crucial for achieving the right color palette. Experimenting with different settings will help you find the perfect harmony between coolness and warmth, allowing your images to convey the intended mood.
3. Maintaining Proper Focus
Reduced visibility in foggy conditions makes it challenging to maintain proper focus. Mastering depth-of-field manipulation allows you to control which portions of your image are sharp or soft. This technique generates captivating shots that draw viewers into their dreamy embrace.
4. Foggy Lens Care
Moisture buildup on your lens can lead to decreased contrast and clarity in your photos, so it’s essential to pay special attention to foggy lens care. Keeping a microfiber cloth handy for quick cleaning sessions during those humid shoots can help keep your lens clear and your photos looking sharp.
5. Investing in Weatherproof Protection
Foggy conditions can also pose a threat to your equipment. It’s vital to ensure that your gear remains protected against inclement weather conditions. Weather-sealing essentials such as waterproof covers or bags safeguard your equipment from moisture damage and provide peace of mind so you can focus solely on capturing awe-inspiring images amid swirling mists.
6. Mastering the Mystical Haze
By adjusting shutter speeds and white balance settings, expertly manipulating depth-of-field, caring for lenses in misty environments, and investing in weatherproof protection, you can become a master at navigating through enchanting fog-filled landscapes. With these techniques, you can wield photography’s magic wand with confidence, capturing awe-inspiring images that transport viewers to a world of enchantment.
Composition Techniques for Capturing Fog
Foggy conditions offer a magical and mysterious atmosphere for capturing stunning photos and videos. Incorporating the right composition techniques can enhance the overall mood and invite viewers into a dreamy world. Here are some composition techniques to consider when shooting in foggy environments.
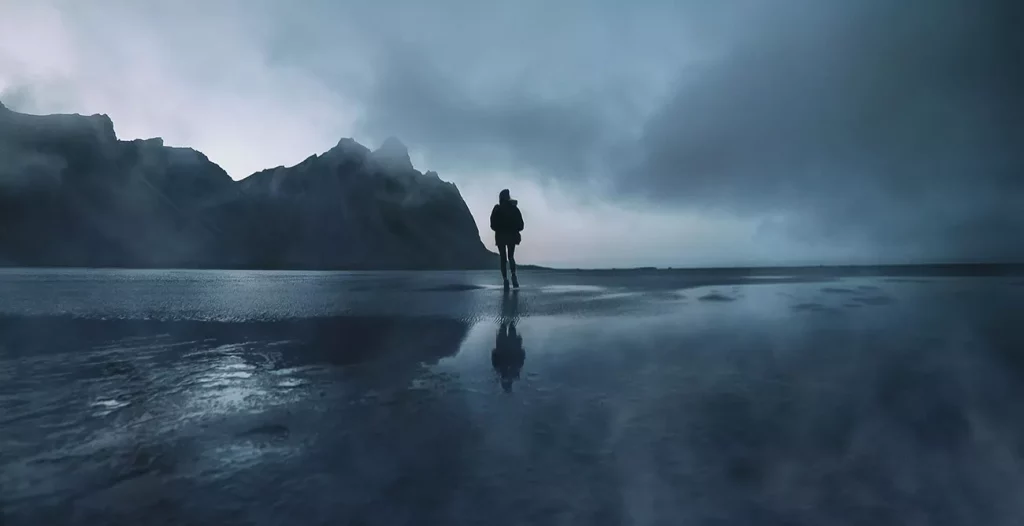
1. Foggy Reflections
Foggy reflections can create an ethereal atmosphere as they reflect the surroundings. This technique prompts viewers to question their perspective and adds a sense of mystery to your composition. Playing around with different angles can help you capture the perfect reflection shot and add an intriguing element to your work.
2. Silhouetting Subjects
Silhouetting subjects against a foggy backdrop is another powerful technique worth considering. It accents the subject’s shape and form while evoking feelings of mystery and intrigue. This technique highlights the contours and structures of your subject and creates a striking contrast against the foggy background.
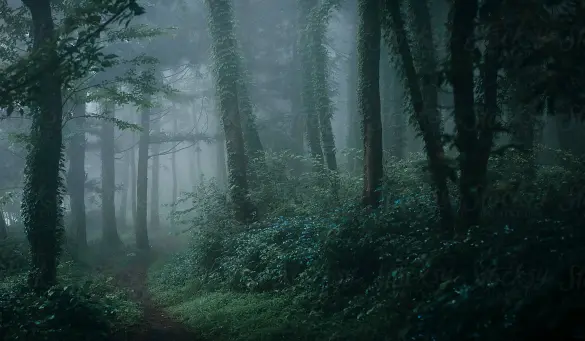
3. Layered Landscapes
Layered landscapes work wonders in foggy settings. The layers slowly emerge from the haze, giving depth to your images while maintaining an air of mystique. This technique adds a sense of dimensionality to your composition and creates an illusion of depth. Experimenting with different lenses and angles can help you achieve a unique and captivating layering effect.
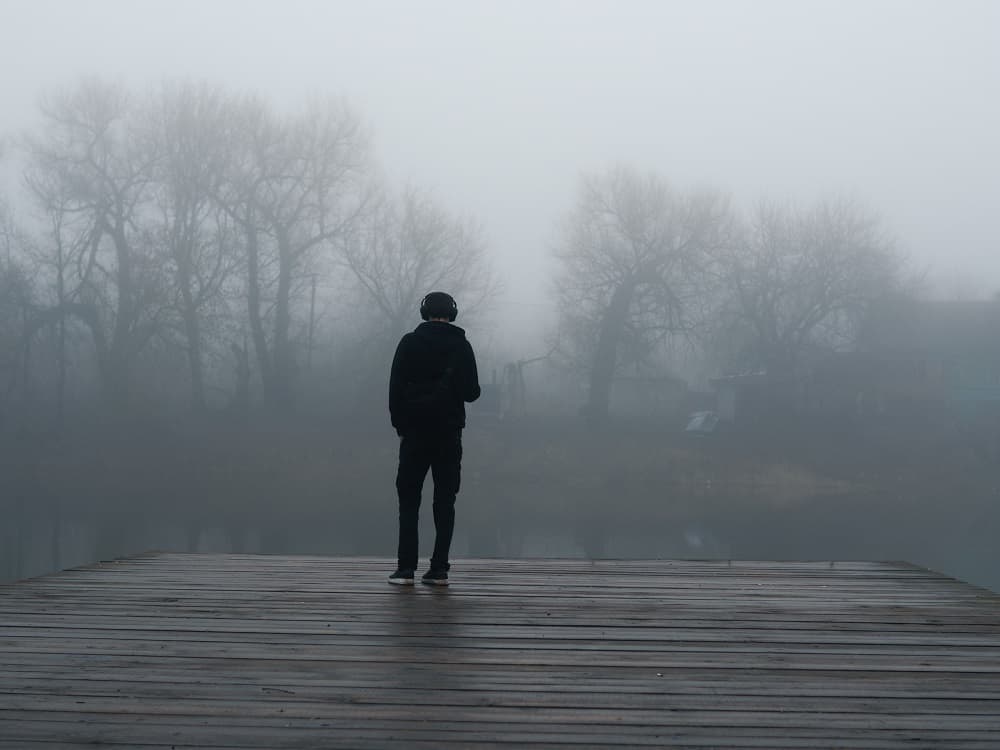
4. Minimalist Compositions
Minimalist compositions thrive in foggy settings by emphasizing simplicity and allowing negative space to speak volumes. This technique relies on one or two strong elements that stand out against a diffused background, resulting in a striking scene that captivates your audience.
5. High-Contrast Scenes
High-contrast scenes are another fantastic option for creating compelling imagery in less-than-ideal visibility conditions. By isolating bold shapes or patterns against the softness of the fog, you can produce eye-catching visuals that demand attention. This technique highlights the contrast between light and dark areas, creating a dramatic effect that amplifies the mood of your composition.
6. Experiment and Let Creativity Flow
Remember to experiment with different composition techniques when capturing photos or filming in foggy environments. Each foggy condition provides a unique atmosphere, and there is no one-size-fits-all approach. Embrace the unique qualities of each setting and let your creativity flow.
By incorporating these methods—foggy reflections, silhouetting subjects, layered landscapes, minimalist compositions, and high-contrast scenes—, you can transform ordinary scenes into extraordinary works of art that leave lasting impressions on those who experience them. So go ahead and immerse yourself in the magic of fog, and there is no limit to what you can achieve with these tips at hand!
Utilizing Fog for Mood and Atmosphere
Fog is a powerful tool in photography and filmmaking, capable of enhancing mood and atmosphere to make your creations both captivating and unforgettable. With its ability to evoke various emotions, from mystery and intrigue to melancholy and isolation, the unique characteristic of fog provides unprecedented opportunities for atmospheric storytelling. Here are some tips for utilizing fog to create stunning visuals that captivate your audience.
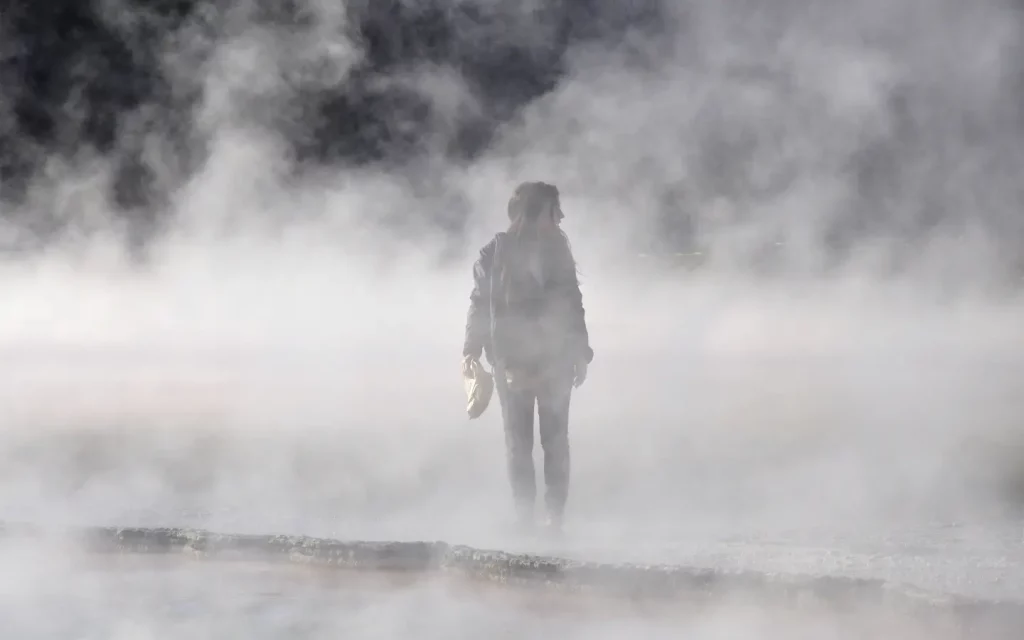
1. Utilize Fog Props for Density and Visual Interest
Adding density to your fog can create layers that envelop your subjects or scenes, resulting in depth and visual interest. Artificial fog machines or dry ice can produce dense layers of fog that help set the stage for your composition. Experimenting with different levels of thickness can achieve the perfect balance between fog density and visibility, ensuring that your creation is both compelling and visible.
2. Play with Color Psychology
The use of different color temperatures in your lighting can enhance the mood created by your fog. Cool blue tones can emphasize feelings of eeriness or sadness, while warm amber hues can suggest nostalgia or romance. By experimenting with various color temperatures, you can add another layer of emotion to your composition and create a more captivating overall mood.
3. Create Striking Silhouettes
Backlighting techniques behind your subject or scene can create striking silhouettes shrouded in fog. This effect can add to the overall mystery and intrigue of the scene. The dramatic contrast created by the backlighting effect can result in an iconic image that lingers in the viewer’s mind long after the viewing.
4. Achieving the Right Balance
Finding the perfect balance between fog density and visibility is critical when creating the desired emotional response. Too much fog might obstruct key elements in your frame, while too little might not achieve the atmospheric effect you’re aiming for. Experiment with levels of thickness until you find just the right balance that complements your desired emotional response, effectively enhancing your composition.
5. Heighten Emotion with Atmospheric Storytelling
Using fog as a critical tool in your photography and filmmaking toolkit invites a fascinating world of atmospheric storytelling. Through careful manipulation of lighting, visibility, and density, you’ll masterfully use fog as a means to heighten emotion and captivate audiences with unforgettable narratives.
Lighting Considerations in Foggy Environments
Working with fog can be tricky, but the unique atmosphere it brings to visual media is well worth the effort. Lighting plays a crucial role in creating the mood and overall aesthetic of foggy compositions. Here are some key considerations to keep in mind when working in a foggy environment.
1. Positioning Lights for Silhouettes
One effective technique in foggy environments is to create silhouettes using carefully positioned lights placed behind subjects or scenes. This method can produce a dreamy and mysterious feel and enhance the fog’s presence. Diffused shadows form from the backlighting effect that adds depth and intrigue to the final image.
2. The Influence of Color Temperature
Experimenting with color temperature adjustments can drastically alter the final mood of a foggy composition. Cold blue hues enforce a sense of eeriness, while warm amber tones engender a romantic or nostalgic atmosphere. By understanding and working with different color tones, clarity and emotional depth is amplified in the visuals.
3. Using Natural and Artificial Light
Utilizing natural light sources to enhance your foggy composition convey an authentic and visually stunning atmosphere. Even the faintest streetlamp can add exciting patterns to the fog or wet surfaces in the reflection. For artificial lights, diffusion tools such as softboxes can aid in achieving a beautifully diffused glow that compliments the hazy surroundings.
4. Mastering Foggy Lighting Techniques
Lighting in a foggy environment takes patience and practice to master, but the results can be mesmerizing. Unique and unpredictable lighting conditions can create opportunities for stimulating visuals that impress viewers. By mastering the lighting techniques, the true potential of foggy environments in photography and filmmaking is unlocked.
Post-Processing Techniques for Enhancing Foggy Images
Capturing captivating foggy scenes is just the beginning. Post-processing enables you to bring your artistic vision to life. About 74% of photographers consider editing a critical part of their creative process, so in good company. Here are some key post-processing methods that will help make your foggy photos stand out:
1. Fog Layering
Intensify the atmosphere and depth of your photos by layering fog effects. This technique involves blending multiple layers of the same image or using fog textures on top of the original photo, which allows you to adjust opacity and blending modes for a more natural result. Use masks to apply the effect selectively where required.
2. Color Adjustment
Tweak colors in your image to enhance the mood, making them warmer or cooler based on the desired emotion. Split-toning with unique color combinations and using gradient maps for added tonal control are ways for you to experiment with colors.
3. Contrast Manipulation and Clarity Enhancement
These two techniques go hand-in-hand when working with foggy images. They reveal hidden details within the haze. Boost micro-contrast to add texture and detail to images, but be mindful not to overdo it as excessive contrast can reduce realism.
4. Textured Overlays
Textured overlays like subtle patterns you would find in nature or water droplets on glass can play an essential role in making images appear ethereal while maintaining their natural look. When judiciously applied, even more depth and dimensionality can be added to your already mesmerizing foggy scene.
Through practice and creativity, you’ll become a master of post-processing, transforming foggy photos into captivating visual stories that evoke a sense of wonder and emotion.
Tips on Using Fog In Your Photography
Fog adds a magical touch to a photo, creating an atmosphere and capturing the mood. Here are some tips on how to effectively use fog in photography to achieve the desired effect.
1. Create Atmosphere
To capture the ideal images, lighting is essential. Visible light present in the photo can set the mood or tone of the shot. Haze or theatrical fog machines and hazers are the easiest and most effective way to add and control the atmosphere on set. The Rosco fog & haze machine is a great example of a machine that can help you adjust the fog density and arrange the atmosphere according to your need.
2. Contrast Control
The amount of fog present in the photograph affects the light reflected and the density of the shadows. To achieve the desired results, controlling the density of the fog is extremely important. To prevent the shadows from becoming too dense, photographers can pour more fog in the shot to help reflect the light. A little less fog creates dense shadows and can provide the desired impact. Paying attention to these details can help manipulate the contrast to achieve the desired effect.
3. Mind Your Angles
Angles and positioning decide the appearance of the shafts of light in the final photograph. Aiming the background lights back towards the camera at a 45° angle from behind the subject can work wonders in creating shafts of light. If shafts are hard to discern, move the light closer to the subject matter and aim it back towards the camera for clarity.
4. Quality of Light
The quality of light—beams or a soft feathery haze—can have a significant effect on the overall outcome of the shot. Choose the right fixture or modify already existing fixtures accordingly for the best quality. Focusable continuous lights such as ETC Source Fours or fresnels can be used to create tight beams of light in photographs, while strobes can reflect light in unintended directions, making it difficult to create the desired effect.
5. Shaping the Light
Shaping the light allows for texturizing the beam in the photograph. Using objects in the surroundings such as windows, open doorways, or tree branches, can add texture and shadows into the beam of light. If these objects are not present, making a snoot or cucoloris using Rosco Cinefoil can be an effective alternative.
Professional photographers also recommend exploring Rosco’s extensive catalog of Gobos, which can break up and shape the light and create much more interesting shafts of light in the photograph.
Tips for Using Fog in Your Filmmaking
Using fog in your film can enhance the atmosphere and give your shots a unique cinematic look. Here are some tips to help you use fog effectively in your production.
1. Go for a Haze Machine Instead of an Actual Fog Machine
While a fog machine can be great for low-end video productions or film projects, professionals prefer to use a haze machine instead. Haze machines are more expensive, but they are extremely useful in creating a cinematic look. If you don’t have the backing of a large video production company to spend money, then renting one can be an option.
Renting can be great for short-term projects since these rent for approximately $150 to $200 each week. However, if you’re looking at future projects and thinking of it as a must-have, it’s best to invest in a haze machine.
2. Carry and Use a Great Camera
Having a good camera is important since newer models have better sensors and resolution, which makes them better at capturing smoke, haze, and fog. If you intend to include fog in your film, it is best to have a camera that can capture it effectively. You don’t necessarily have to buy a new camera, but it can be a worthy investment if you can afford it.
3. Make Sure the Fog is in the Right Place
A vision where you intend to place the fog in your scene. Using an electric fan on a low setting can help get the smoke to go where you want. You can also use the ventilation already present in your room depending on what you aim to achieve. The placement of your camera in relation to the fog will also matter.
4. A Little Bit Can Go a Long Way
A little fog, smoke, or haze is more than enough to create the desired effect. Too much fog can stall production and give you a ton of headaches. It is best to resist the urge to use too much since you can always add more smoke if needed.
5. Make Use of Stock Footage
If you realize that a scene could have looked amazing with some fog or smoke, but it’s too late to add it, you can make use of stock footage. Most stock image sites have great assets you can use to increase the beauty of your composition. Be subtle with its use so that it blends well with the rest of the production.
FAQs
Fog is utilized in photography and filmmaking to create ambiance, mood, and depth within a scene. It adds an ethereal or mysterious atmosphere, enhances the perception of distance, and can soften harsh lighting conditions, adding a sense of drama or romanticism to the visuals.
Fog effects can be achieved using several methods. For instance, fog machines that vaporize a specialized fog fluid are commonly used. Dry ice or liquid nitrogen can also produce low-lying fog when placed in warm water. Additionally, natural fog can be utilized on location or artificial aerosol sprays can create smaller localized foggy areas.
In photography and filmmaking, various types of fog effects are employed, including:
Soft Fog: Creates a gentle haze, ideal for adding depth and softening harsh light.
Thick Fog: Generates a dense, opaque fog that obscures visibility and enhances mystery.
Low-Lying Fog: Lies close to the ground, often used to create a haunting or eerie atmosphere.
Rising Fog: Ascends upward, adding drama or emphasizing specific visual elements.
Fog can significantly alter lighting conditions and camera settings. It diffuses light, reducing contrast and softening shadows. To capture foggy scenes effectively, photographers and filmmakers might need to adjust exposure settings, use longer shutter speeds, wider apertures, or compensate for the fog’s diffusing effect by increasing contrast or adjusting white balance.
Yes, several challenges exist when using fog effects. Controlling the density and movement of the fog to suit the narrative can be challenging. Additionally, ensuring the safety and comfort of actors and crew, avoiding overexposure in the footage, and maintaining consistency in the fog’s appearance across multiple shots are crucial considerations.
Fog effects play a crucial role in storytelling by enhancing mood, creating atmosphere, and evoking emotions. They can signify mystery, danger, romance, or isolation depending on their usage. Cinematically, fog effects add depth to visuals, highlight specific elements, and create a sense of scale or distance, amplifying the impact of the narrative and engaging the audience on an emotional level.
Foggy conditions can affect your photography by reducing contrast and visibility, and even distorting the direction and intensity of light. However, this can be used to your advantage by adding a unique mood and atmosphere to your images. With careful use of fog, you can change the way your images are perceived and create a dynamic layer of atmosphere.
Why would you want to create a fog effect? Despite the difficulties in controlling it, adding fog to your product photos can bring a mystical quality that can enhance the storytelling element of the image. It also provides a dreamy or moody quality, which can be useful for any subject. Additionally, since photographs are limited to 2D, the depth and dimension that fog provides can be vital in presenting the 3D products. Lastly, it simply looks cool and can attract viewers’ attention. Adding fog can make your photos stand out and make people take a second look, making it an attractive choice for photographers and filmmakers alike.
Fog can significantly reduce visibility, limiting one’s sight to only one kilometer. Mist, on the other hand, can decrease visibility between one and two kilometers. There are various types of fog that affect visibility, such as radiation fog, advection fog, valley fog, and freezing fog.
To achieve the ethereal and atmospheric effects of fog in photography and filmmaking, the ideal water to dry ice ratio is about 1/2 gallon of hot water per pound of dry ice. This combination will create long-lasting fog effects. By using the correct amount of hot water, the fog can be maximized for the perfect ambiance.
Conclusion
In conclusion, this article provides a comprehensive guide for using fog effects in photography and filmmaking. By understanding the role of exposure time, shutter speed, and diffusion filters, photographers and filmmakers can create stunning atmospheric effects that add depth to their work.
Whether it’s capturing shafts of light, ambient light, or beams of colored light, creativity is illuminated when using fog to add intensity and layers of light to an image. With tips on composition and camera settings, beginners and experienced professionals alike can benefit from incorporating fog into their work.