Why Is My Fog Machine Leaking? 7 Common Causes & Fixes
This post contains affiliate links. As an Amazon Associate, we earn from qualifying purchases.
A fog machine leaks because its fluid tank is overfilled, its nozzle or line is clogged, or an internal seal, gasket, or pump has failed. The exact fix depends on locating the leak’s source. Start by checking the fluid level and cap, then clear any nozzle blockage, and finally listen for irregular pump sounds.
Your fog machine is leaking because of one of three primary issues: a simple overfilled tank, a clogged nozzle or fluid line, or a failed internal seal, gasket, or pump. The fix depends entirely on locating the exact source of the fluid. Start by checking the fluid tank level and cap seal, then inspect the output nozzle for blockages, and finally listen for irregular pump sounds.
Most people see a puddle and assume the pump is dead. They start looking up replacement parts before they check the simplest thing. The truth is, about half of all leaks come from user error or routine maintenance neglect, not a catastrophic failure. Force the wrong fix and you can turn a $5 seal problem into a $100 pump replacement.
This guide walks you through the seven most common causes, shows you exactly where to look, and gives you the steps to fix it yourself or know when to call it. We’ll cover everything from a dripping nozzle to a mystery leak from the machine’s belly, including the specific design flaws in budget models that cause chronic leaks.
Key Takeaways
- Overfilling is the #1 cause. Fill to the MAX line, not above. Excess fluid has nowhere to go but out through vents or weak seals.
- A clogged nozzle forces fluid backward. It pools inside the machine and finds the path of least resistance, often a loose tube fitting.
- Budget machines leak at predictable weak points: the plastic air bubble container, the adhesive on the connecting tube, and the thin reservoir seam.
- Never use tap water to clean or dilute fog fluid. The minerals leave scale that clogs and corrodes, guaranteeing future leaks.
- If fluid is leaking from anywhere other than the nozzle, unplug the machine immediately. An internal hose or seal has failed, and fluid near electrical components is a short-circuit risk.
The 3 Most Common Leak Locations
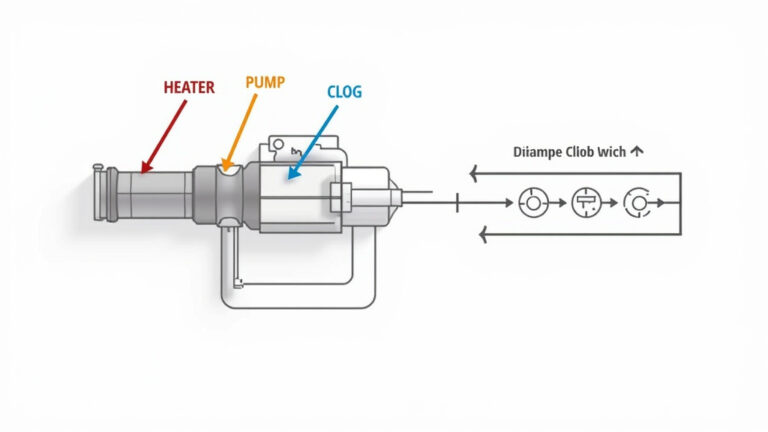
Head design changes the entire process. Look at the business end of your trimmer. The first step is to know where to look. Fog machines have three typical failure points, and each tells a different story about the cause.
The plastic air bubble container sits near the heating element. A small hole on its top lets air in to create the fog-filled bubbles. If this container is overfilled, cracked, or the hole is blocked, fluid will weep out the sides. On many low-cost models, this part is made from brittle plastic that cracks after a few heat cycles.
The connecting tube links the fluid reservoir to the pump or heating chamber. This tube is often secured with a weak adhesive or a loose friction fit, not a proper clamp. Vibration from the pump works it loose over time. You’ll see fluid tracking along the tube’s length.
The fluid reservoir or tank itself can leak from the cap seal or a seam. The cap’s O-ring dries out and flattens. The tank seam, especially on plastic tanks, can stress-crack if the machine is dropped or stored with fluid in freezing temperatures.
Common mistake: Topping off the tank “just a little more” for a long party, the thermal expansion of the fluid during heating pushes the excess out through the air bubble container or tank vent, creating a slow drip that looks like a pump failure.
TL;DR: Check the air bubble container for cracks, the connecting tube for loose ends, and the tank cap for a worn seal. One of these three is leaking in 80% of cases.
Why Is My Fog Machine Leaking? The 7 Likeliest Causes
The pump isn’t always the villain. Here’s the breakdown of what’s actually happening, ranked from most to least common.
1. Overfilled Fluid Tank
This isn’t complicated. The tank has a MAX line for a physical reason. Fog fluid expands when it heats. An overfilled tank has no air buffer for that expansion, so the fluid gets pushed out through the tank’s vent or past the cap seal. It’s the first thing to check and the easiest to fix.
2. Clogged Nozzle or Fluid Path
Residue from old or low-quality fluid builds up inside the nozzle or the small internal tubes. The pump pushes fluid against this blockage, pressure builds, and the fluid takes an easier path, usually backward past a weak connection or seal. A full clog means no fog and a puddle underneath.
3. Worn-Out Seals and Gaskets
The O-ring on the tank cap and the gaskets between the pump and its fittings are consumable parts. Heat and chemical exposure make them hard and brittle. A hardened seal doesn’t flex to create a tight closure. Fluid seeps through microscopically, leaving a slow, persistent leak.
4. Loose or Cracked Fluid Lines
The internal tubing is plastic or silicone. It becomes brittle with age and heat. A hairline crack or a tube that’s slipped off its barb fitting will drip fluid directly into the machine’s housing. This is a common fog machine repair scenario for machines over three years old.
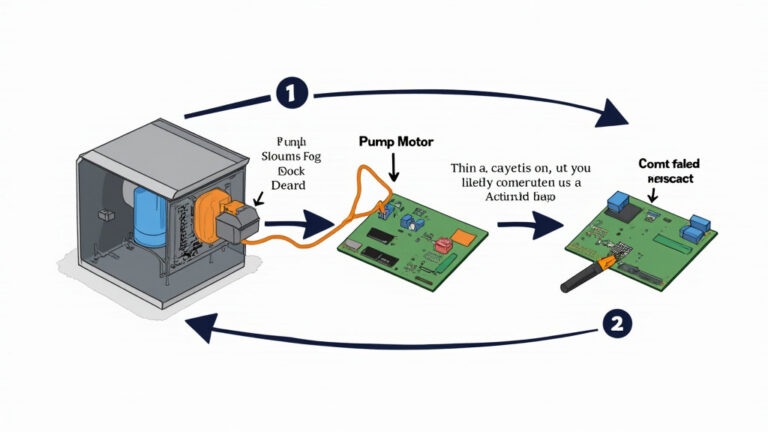
5. Pump Failure
The pump’s job is to move a precise amount of fluid. If its internal diaphragm or valves wear out, it can’t build pressure. Fluid either doesn’t move (no fog) or leaks past the pump’s own seals. You’ll often hear a change in sound, a weaker, sputtering click instead of a firm tick-tick-tick.
6. Faulty or Stuck Valve
Some machines have a solenoid valve that opens to allow fluid to flow. If this valve gets gummed up with residue or fails electrically, it might not close fully. Fluid then drips through continuously by gravity, even when the machine is off.
7. Design or Manufacturing Flaws (Budget Models)
This is the elephant in the room. Some inexpensive machines are built with cost-cutting measures that guarantee leaks. The air bubble container is glued, not welded. The tube fittings are push-in plastic, not threaded. The tank plastic is thin and prone to stress cracks. If your new machine leaks out of the box, this is likely why. A thorough fog machine troubleshooting process should start with inspecting these known weak points.
| Cause of Leak | Most Likely Location | DIY Fix Difficulty |
|---|---|---|
| Overfilled Tank | Tank cap or vent | Easy – drain excess fluid |
| Clogged Nozzle | Output nozzle | Easy – clear with a needle |
| Worn Seal/Gasket | Tank cap or pump fittings | Moderate – replace O-ring |
| Loose/Cracked Tube | Internal tubing | Moderate – re-seat or replace tube |
| Pump Failure | Pump housing | Hard – often requires replacement |
| Faulty Valve | Solenoid valve area | Hard – may need professional service |
| Design Flaw | Various weak points | Variable – may not be fully fixable |
How to Fix a Leaking Fog Machine: A Step-by-Step Guide
Follow this sequence. Jumping to step five because you’re sure it’s the pump will waste an afternoon.
Before you start: Unplug the machine and let it cool completely. Fog fluid is slippery and conductive, getting it on live electrical parts can cause a short. Work on a surface covered with paper towels or a rag.
Step 1: Locate the Exact Leak Source.
Dry the entire exterior with a cloth. Place the machine on a fresh, dry paper towel. Plug it in and turn it on for just 15-20 seconds. Watch where the wet spot appears on the towel. This tells you if the leak is high (near the tank) or low (under the pump/heater). Unplug it again.
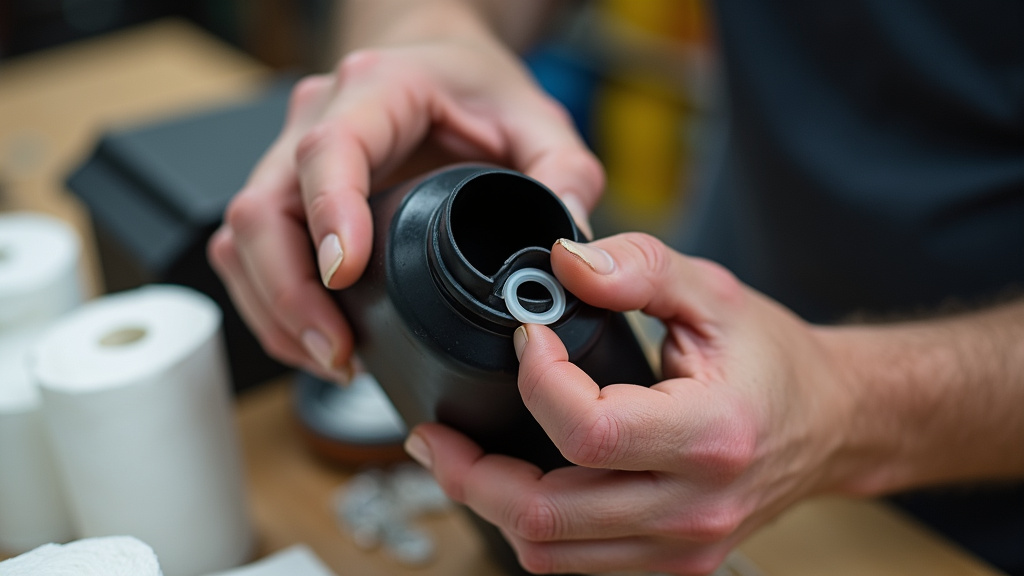
Step 2: Inspect and Correct the Fluid Tank.
Remove the tank. Is it above the MAX line? Drain it down. Check the cap’s rubber seal. Is it flattened, cracked, or missing? A hardened seal won’t seal. You can sometimes temporarily improve it by soaking the O-ring in warm water to soften it, but replacement is best.
Step 3: Clear the Nozzle.
Locate the fog output nozzle. Use a sewing needle or the thin wire from a bread bag tie. Gently insert it into the nozzle opening and wiggle it to break up any crusty residue. Don’t use force, you could damage the small heating element inside. This simple act solves many common fog machine issues.
Step 4: Check Accessible Fittings.
If your machine’s casing allows, remove the outer shell (consult your manual for screw locations). Look for the clear plastic tubing. Trace it from the tank to the pump and from the pump to the heating chamber. Gently push each tube onto its barbed fitting. If a tube is cracked or yellowed and brittle, it needs replacement. A small zip tie can secure a loose connection.
Step 5: Run a Cleaning Cycle.
Residue is a major culprit. Mix a 50/50 solution of distilled white vinegar and distilled water. Fill the tank about a quarter full. Run the machine outdoors until the tank is empty, letting the vinegar solution dissolve internal scale. Follow with a tank of pure distilled water to rinse. Never use tap water. This is core to cleaning a fog machine for optimal performance.
Step 6: Listen to the Pump.
After cleaning, fill with proper fog fluid. When you run it, listen closely. A healthy pump makes a consistent, rhythmic ticking. A failing pump sounds erratic, weak, or makes no sound at all. If the pump is silent but the heater works (the machine gets hot), the pump is likely dead.
Step 7: Assess and Replace.
If you’ve fixed a clog or a loose tube, test again. If the leak persists from inside the housing, you’re likely looking at a failed internal seal or pump. For most users, this is the point to decide between a professional repair and replacement. For a $50 machine, buying a new one often makes more sense.
What Not to Do: Mistakes That Make Leaks Worse
Patience rewards. Force the line, force the cover, force the wind direction, all three break things.
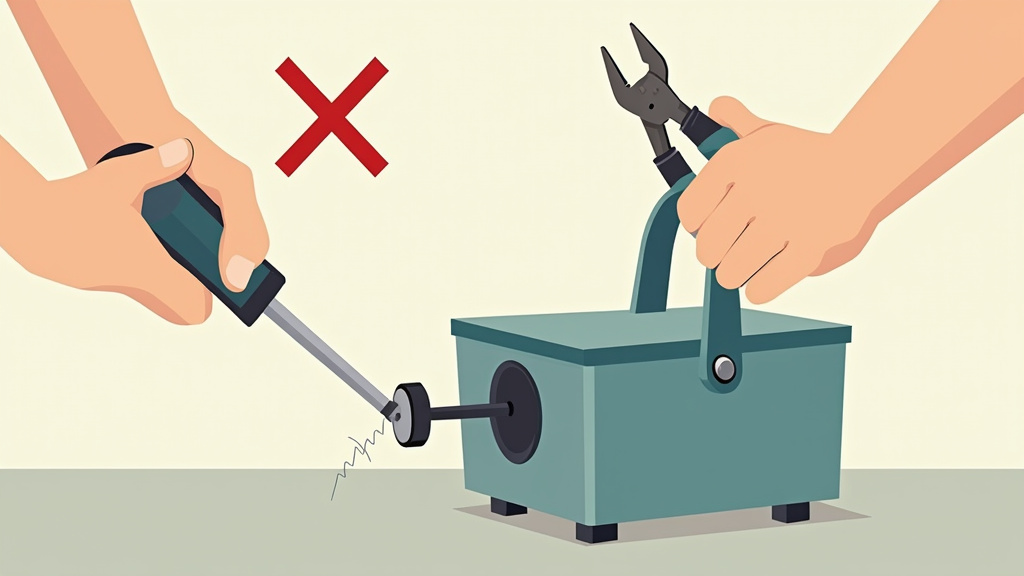
Don’t Use Force to Clear a Clog. Stabbing a nozzle with a thick wire or screwdriver can permanently distort the orifice or puncture the internal heater coil. The machine is then scrap.
Don’t Overtighten Fittings. Plastic barbs and threads strip easily. Tighten by hand until snug, then give a quarter-turn more with pliers if needed. Cranking down on a plastic cap will crack it, creating a new leak.
Don’t Ignore Storage. Storing a machine with fog juice inside, especially in a cold garage or hot attic, accelerates every problem. The fluid degrades into a gummy resin that clogs everything. Always follow proper storing fog fluid protocols by running the tank dry or using a pump-safe fluid preservative.
Don’t Assume All Fluids Are Equal. Cheap, oily fluids leave more fog machine residue that hardens into clogs. Thick, non-water-based fluids can damage the pump. Stick with reputable, water-based brands listed in your manual.
The Budget-Machine Problem: Specific Weak Points
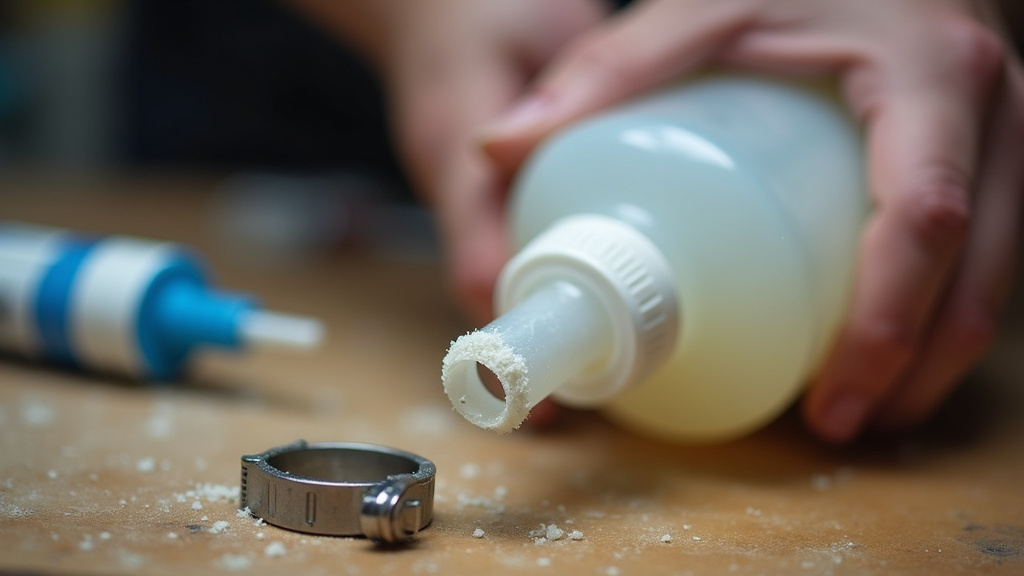
I ran a no-name Amazon fogger for two Halloween seasons. It worked until the third. Then, a slow drip appeared from the base, no matter what I did. Taking it apart revealed the issue: the connecting tube had simply pulled away from the plastic bubble container. The “adhesive” was a dab of hot glue that melted over time.
The fix was a tiny hose clamp and some high-heat silicone sealant. It held for another year. The lesson wasn’t about the repair. It was about the design. Budget models prioritize low assembly cost over long-term reliability.
These are the specific weak points to inspect on a low-cost machine:
* The Air Bubble Container: Made of thin, often translucent plastic. Look for hairline cracks near the connection points or around the small air hole on top.
* The Tube Adhesive: The tube is often glued, not clamped. The glue degrades with heat. Look for a ring of crystallized gunk around the tube joint, that’s the failed adhesive.
* The Reservoir Seam: Hold the empty tank up to a bright light. Look for fine cracks along the molded seam, especially near the bottom. A stress crack here explains a slow seep.
If your machine has these flaws, a permanent fix is difficult. Reinforcing with sealant or clamps is a temporary patch. This is a key factor in a DIY vs. professional repair cost analysis. Spending $40 on parts and hours on a $60 machine rarely pays off.
Preventing Future Leaks: Maintenance That Actually Works
Maintenance isn’t an optional chore. It’s the price of a leak-free machine. This routine takes 10 minutes and saves a $100 repair.
After Every Use (The Non-Negotiable):
Run the machine until the tank is completely empty of fog fluid. This clears the fluid lines and pump. Let the machine heat cycle once more to vaporize any remaining moisture in the heating chamber. This single habit prevents 90% of clogs.
Monthly (If in Regular Use):
Perform the distilled water rinse cycle. Check the tank cap O-ring for pliability. Wipe the exterior vents free of dust. Dust sucked into the machine mixes with fluid residue to form a paste that blocks airflow and insulates components, causing overheating.
Seasonal (Before Long-Term Storage):
Run the cleaning cycle with vinegar solution. Let the machine dry completely with the cap off. Store it in a plastic bag or original box in a climate-controlled space, not a damp basement or hot attic. Temperature extremes warp plastic and crack seals. Understanding fluid shelf life is crucial here; never store the machine with old fluid inside.
Fluid Wisdom:
Always use high-quality, water-based recommended fog fluids. They are formulated to vaporize cleanly and leave minimal residue. Never dilute with tap water. If you need less dense fog, use a fluid specifically designed for that purpose or a professional haze fluid.
| Maintenance Task | Frequency | Prevents This Leak Cause |
|---|---|---|
| Run Tank Dry | After each use | Clogged nozzle & lines from residue |
| Distilled Water Rinse | Monthly or every 10 hrs of use | Mineral scale buildup in heater |
| Inspect Tank Cap Seal | Monthly | Leak from tank vent or cap |
| Check External Fittings | Seasonally | Leak from loose tubing |
| Full Cleaning Cycle | Before storage | Systemic residue clogs & pump wear |
When to Call a Professional or Replace the Machine
Some leaks are stop signs. Know when to hand over the screwdriver.
Call a Pro If:
- Fluid is leaking from inside the housing and you’ve confirmed the tank and nozzle are not the source. This means an internal hose, seal, or the pump itself has failed.
- The machine shows electrical issues, sparks, burning smell, tripped breaker, along with the leak.
- The pump is dead (no ticking sound) but the heater still works. Pump replacement requires soldering and precise calibration on many models.
Replace the Machine If:
- The cost of repair (parts + professional labor) exceeds 60% of the price of a comparable new unit.
- The fluid reservoir or critical housing component is cracked and unavailable as a spare part.
- It’s a very low-cost model (<$80) with multiple design-related failures. Your time and money are better spent on a more robust machine.
A persistent leak that causes premature shutdown or floor moisture issues is a sign the problem has escalated beyond simple maintenance.
Frequently Asked Questions
Can a clogged fog machine cause a leak?
Yes, absolutely. A clog in the nozzle or internal fluid line creates back-pressure. The pump continues pushing fluid against the blockage until it forces its way past the weakest seal or connection in the system, causing an internal leak that often drips out the bottom.
Is it safe to use a fog machine that is leaking?
No. Unplug it immediately. Fog fluid is conductive and can cause a short circuit if it reaches electrical components. It’s also slippery, creating a fall hazard, and some fluids can irritate skin. Diagnose and fix the leak before using the machine again.
Why does my fog machine leak only when it’s turned off?
This points to a gravity-fed leak, not a pressure-related one. The most common causes are an overfilled tank (fluid slowly seeping out the vent) or a faulty valve that isn’t closing completely, allowing fluid to drip through the system by gravity alone.
Can I use plumber’s tape or silicone to stop a leak?
For external, non-pressure fittings, like where a tube connects to a plastic barb, a small amount of high-heat silicone sealant can work as a temporary fix. Never use it on the nozzle, pump, or any part that gets extremely hot. Plumber’s tape (Teflon tape) can help seal threaded fittings, but it’s rarely the right solution for fog machine tubing. These are patches, not permanent repairs.
How long do fog machine seals typically last?
With regular use of quality fluid and proper cleaning, the main tank cap O-ring and pump gaskets should last 2-3 years. In machines that use cheap fluid, run constantly, or are stored poorly, seals can harden and fail in under a year. You’ll know they’re gone when you see a persistent, slow seep even with a correct fill level.
Will using different fog fluid stop my machine from leaking?
Switching to a high-quality, water-based fluid can prevent future leaks caused by residue clogs. It will not fix an existing leak caused by a cracked tube, worn seal, or pump failure. However, using better fluid is a critical part of the fix after you’ve repaired the physical cause.
The Bottom Line
A leaking fog machine usually isn’t a death sentence. Start with the simple stuff: check the fill level, clean the nozzle, and tighten what you can see. Most of the time, that’s all it takes. The problems start when you ignore the small drip or try to force a fix with the wrong tools.
Remember the hierarchy: overfilling and clogs first, loose tubes second, worn seals third. The pump is the last suspect, not the first. And if you own a budget model, understand its inherent weak points, that knowledge is your best defense against a recurring leak.
Keep the fluid fresh, run the tank dry, and store it right. That’s the trifecta that keeps the fog flowing and the floor dry. Now go find that leak.