Yes, thermal fogging is an excellent method for odor removal. By dispersing a fine mist, thermal fogging can penetrate deep into porous materials and hard-to-reach areas, effectively neutralizing odor molecules.
This process allows for maximum penetration and permanent elimination of offensive odors, making it a popular choice for both residential homes and commercial spaces.
Thermal fogging is particularly effective for removing smoke odors and other difficult odors, making it a valuable tool for professional odor removal services.
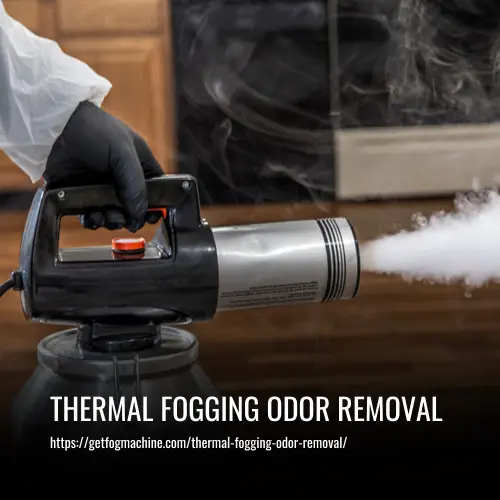
What is Thermal Fogging
Thermal fogging is a process that utilizes heat to generate a dense, white fog capable of reaching every nook and cranny in an affected area. By heating a deodorizing agent, a thermal fogger creates a thick vapor that permeates porous materials and effectively neutralizes offensive odors.
This method ensures maximum penetration and eliminates odors caused by smoke damage, pet odors, and various other unwanted smells. Unlike more traditional odor removal techniques, thermal fogging can reach areas that are otherwise difficult to access, ensuring a thorough and effective odor elimination process.
How Does Thermal Fogging Work
Thermal fogging works by dissolving and destroying odor molecules. The fog generated by a thermal fogger contains tiny particles that are capable of penetrating all cracks and crevices, reaching areas that other methods cannot reach. This makes thermal fogging an excellent method for removing difficult odors, such as smoke damage or pet odors, from porous materials.
The fog not only eliminates odor but also leaves a fresh, clean scent behind. Thermal fogging is a popular method used by professional odor removal services and is highly effective in combating offensive odors in residential homes, rental car fleets, limousine companies, and other spaces.
Why Thermal Foggers are a Great Choice for Odor Removal
Thermal foggers are highly effective tools for odor removal, offering several advantages over other methods. Whether you are dealing with smoke odors, pet odors, or cooking odors, thermal fogging can provide excellent results.
1. Effective Odor Removal
Thermal fogging is known for its exceptional ability to eliminate offensive odors. This method works by creating a fog of tiny particles that can penetrate even the most porous materials. The fog comes into contact with odor molecules and smoke particles, neutralizing them and permanently eliminating the odor.
2. Easy to Use
Thermal foggers are incredibly user-friendly. With a little instruction, you can quickly understand how to operate them effectively. However, it’s important to note that professionals usually handle thermal fogging due to its complexity and potential risks. For optimal results, it is advisable to seek the assistance of experienced technicians.
3. Affordable Solution
Thermal fogging stands out as one of the most affordable odor removal methods available. Its cost-effectiveness makes it an attractive choice for both residential homes and commercial establishments looking to combat unwanted smells within budget.
4. Minimal Mess
When using a thermal fogger, you don’t have to worry about creating a mess. The fog produced is in the form of a fine mist that quickly dissipates. As a result, there is little to no cleanup involved, saving you time and effort.
5. Safe for People and Pets
Thermal foggers pose no safety risks when used correctly. Unlike other methods that involve flames or heat, thermal foggers operate without any open flames, eliminating the risk of fire hazards or burns. Additionally, the fogging solution is non-toxic, ensuring the safety of children and pets.
Types of Thermal Fogging Deodorizers
When it comes to thermal fogging odor removal, there are several types of deodorizers that can be used in conjunction with a thermal fogger. Each type offers its own benefits and is suitable for different situations. Here are some of the most common deodorizers used in thermal fogging:
1. Hydroxyl
Hydroxyls are a commonly used type of deodorizer in thermal foggers. They are a safe and effective method for removing odors. Hydroxyls work by breaking down the molecular structure of the odor molecules.
This results in the elimination of the odor at its source, leaving behind fresh and clean air. Hydroxyl deodorizers are suitable for a wide range of applications, from residential homes to commercial buildings, and they are particularly effective at removing smoke odors.
2. Ozone
Ozone is a powerful deodorizer that can also be used in thermal fogging. It is a highly effective method for destroying odors at their source. However, ozone should only be used by professionals due to its potential health risks. Ozone generators emit ozone gas, which breaks down odor molecules through oxidation.
This effectively eliminates the odors from the surrounding environment. Ozone deodorization is commonly used in scenarios where other methods may not be sufficient, such as for severe smoke damage or deeply embedded odors.
3. Ionic
Ionic deodorizers are another type of deodorizer that can be used in thermal foggers. They work by attaching to odor molecules and neutralizing them. Ionic deodorizers are safe and non-toxic, making them a suitable choice for households with children and pets.
They are effective at combating a wide range of unwanted odors, including pet odors, cooking odors, and smoke odors. Ionic deodorizers are particularly beneficial for porous materials, as they can penetrate deep into the material to eliminate odors.
4. Activated Carbon
Activated carbon is a porous material that is commonly used as a deodorizer in thermal fogging. It works by absorbing odors, trapping them within its porous structure. Activated carbon is safe and non-toxic, making it a suitable choice for households with children and pets. It is effective at removing a wide range of odors, including smoke odors, pet odors, and cooking odors.
Activated carbon is particularly useful for odor removal in challenging scenarios, such as rental car fleets or limousine companies, where offensive odors from different sources may be a frequent issue.
Should You Hire a Thermal Fogging Company
When it comes to effectively eliminating unwanted odors, hiring a professional thermal fogging company can be a wise decision. Here are a few reasons why you might want to consider their services:
1. Trained experts
Hiring professionals who have been trained in thermal fogging ensures that the job is done right. These experts have the knowledge and skills to tackle odor removal effectively and efficiently.
2. Proper equipment
Not all thermal foggers are the same. Professional thermal fogging companies have access to high-quality equipment that can produce a thick, white fog. This allows them to reach odor molecules in even hard-to-reach areas, ensuring maximum penetration for effective odor removal.
3. Right deodorizer
Thermal fogging companies have a wide range of deodorizing agents at their disposal, including hydroxyls, ozone, and activated carbon. With their expertise, they can select the right agent for the specific odor problem and effectively eliminate even the strongest odors.
4. Knowledge of techniques
Thermal fogging companies are well-versed in different techniques for tackling various types of odors. They know how to adjust their methods based on specific conditions, ensuring a quick and effective result.
5. Safety considerations
Not all deodorizers are safe for all situations, especially when it comes to indoor use or around children and pets. Thermal fogging companies have the experience and knowledge to determine which deodorizers are safe for different situations, protecting both your health and the environment.
6. Experience with difficult odors
Dealing with challenging odors requires experience. Thermal fogging companies have years of experience handling difficult odor removal jobs. They know how to adapt their techniques and deodorizers to successfully eliminate even the most stubborn odors.
Preparing for Thermal Fogging: Safety Precautions
When preparing for thermal fogging, it is essential to take certain precautions to ensure a safe and effective odor removal process.
1. Leave the Area
For your safety, it is best to leave the area while the thermal fogging is taking place. This will prevent you from breathing in any potentially harmful fumes. It is also advisable to remove pets and children from the area to protect their well-being.
2. Close All Windows and Doors
Closing all windows and doors is crucial to keeping the fumes inside and preventing them from spreading to other areas of the house. This containment allows the deodorizers used in the fogging process to work more effectively.
3. Turn Off Fans and Air Conditioners
To maximize the effectiveness of thermal fogging, it is important to turn off all fans and air conditioners. This prevents the fumes from being dispersed or blown away, ensuring that they can effectively neutralize the odor molecules in the air.
4. Put Food in the Fridge or a Safe Place
If you have any food that needs to be refrigerated, it is crucial to move it to a safe place where the fumes can reach but not contaminate your food. This step is necessary as the fogging process may help eliminate odors, but it could potentially affect the quality or safety of your food.
5. Shut Off Electronic Equipment
Fumes from thermal fogging can damage electronic equipment, so it is advisable to shut off all such devices to protect them from potential harm. This precautionary measure can help prevent any undesirable consequences.
6. Notify the Nearest Fire Department
To avoid any confusion or unnecessary concerns from neighbors, it is important to notify the nearest fire department before commencing the fogging process. This proactive step ensures that they are aware of the situation and can assist if needed.
7. Disable or Cover Smoke Detectors
Another safety measure to consider is disabling or covering smoke detectors. The fumes produced during thermal fogging may trigger smoke detectors, causing false alarms. Disabling or covering them temporarily during the fogging process helps prevent any unnecessary disruptions.
By following these precautions, you can ensure a safe and successful thermal fogging process to effectively eliminate unwanted odors from your space.
FAQs
Thermal foggers use heat to create tiny particles that can penetrate small spaces both indoors and outdoors. A dark and heavy fog is produced by vaporizing the chosen solution.
Yes, thermal fogging is an excellent method for removing smoke odors from sources such as tobacco, fireplaces, and fires. It not only neutralizes the odors but also helps minimize health issues related to carcinogenic debris.
Thermal foggers often use disinfectants, fungicides, and some insecticides. They are also commonly used for applying deodorizers and smoke remediation chemicals.
Thermal foggers produce smaller particle sizes and create easily visible fog, making them advantageous for mosquito and insect control. They are also more efficient and consume less energy compared to other fogging methods.
Thermal foggers can be used with aqueous liquids or wettable powders containing more than 60% water. However, the application of flammable liquids is prohibited.
Conclusion
Thermal fogging is an effective method for odor removal in a variety of settings. Whether dealing with smoke odors from fire damage, pet odors in residential homes, or unpleasant smells in rental car fleets, thermal fogging can provide excellent odor control and permanent elimination.
The thermal fogging process works by creating a fog of odor-eliminating particles that penetrate deep into porous materials, combating odors at their source. This thorough penetration maximizes odor removal and ensures a true, long-lasting solution.
Unlike other odor removal methods such as ozone generators or deodorization with chemicals, thermal fogging is safe and does not pose any health issues when proper precautions are taken, such as wearing eye protection.
Professional fogging odor removal services and supplies are readily available for both commercial and residential applications. The use of thermal foggers in limousine companies, rental car fleets, and insurance companies is a popular choice to effectively fight against offensive odors and smoke residue.